When Julie offered to do a guest post for IHAN® I went over to her website and saw she had some great tutorials. There are so many people that I know who are expecting grandchildren soon that I thought this tutorial would be a great one to share.
I am very thrilled this week to be a guest blogger here at I Have a Notion®. (Thanks, Kelly!) My name is Julie and I have a blog as well with a slightly different focus: machine embroidery and applique. You can check it out at Machine Embroidery Geek.
Today I am going to show you how to make a cute little applique baby onesie with a little chick design. I have done a bit of applique on baby onesies in the past, and while it is a bit challenging to stitch within such a tight space, it's actually not as difficult as you might think.
For this project, I was inspired by the piece of fabric I purchased the other day. The fabric has a dainty little chick footprint design on it. I thought it would be cute to digitize a little chick applique and then use the chick footprint as the appliqué fabric.
Julie Griffey from Machine Embroidery Geek
I am very thrilled this week to be a guest blogger here at I Have a Notion®. (Thanks, Kelly!) My name is Julie and I have a blog as well with a slightly different focus: machine embroidery and applique. You can check it out at Machine Embroidery Geek.
Today I am going to show you how to make a cute little applique baby onesie with a little chick design. I have done a bit of applique on baby onesies in the past, and while it is a bit challenging to stitch within such a tight space, it's actually not as difficult as you might think.
For this project, I was inspired by the piece of fabric I purchased the other day. The fabric has a dainty little chick footprint design on it. I thought it would be cute to digitize a little chick applique and then use the chick footprint as the appliqué fabric.
I
begin the applique process by stabilizing the design area with an iron-on cut-away stabilizer fused to the inside of the garment. Next I
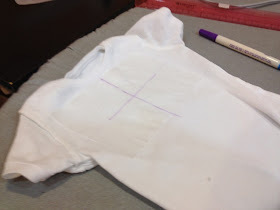
mark where the center of the design should land on both the inside and
the outside of the onesie.
Next,
I hoop a piece of sticky back stabilizer, scour around the edges with a
pin to remove the peel away paper and mark the center of the hoop on
the exposed, sticky stabilizer. Then I turn the onesie inside-out and
stick it onto the exposed sticky-back stabilizer, lining up the center
point on the inside of the onesie to the center of the hoop marked on
the exposed sticky-back stabilizer.
Now
it's time to start stitching. The first layer of stitching forms the
chick's legs and then the placement line for the appliqué piece. When
the machine pauses I lay down the applique fabric piece over the
placement line that has been stitched out. I don't spray any adhesive
onto the onesie, I simply lay that applique fabric that has been fused
to a piece of Heat-and-Bond Lite (Kelly would use Mistyfuse to keep the onsie soft) onto the front of the onesie over the
placement line.
The
next layer of stitching tacks down the appliqué piece to the onesie.
When this is complete, I remove the hoop from the machine and
with appliqué scissors, trim the appliqué fabric as close as possible to
the tack down line without (of course) cutting a hole in the onesie.
Once
the hoop is put back on the machine, I start the next round of
stitching which puts the final satin stitching around the chick shape
and creates a little eye for the chick.
One
important note... when I am embroidering on any type of knit fabric, I
am sure to use a needle that is suitable for stitching on knits.
Needles designed to work with knits do not pierce the fabric, but
instead push their way through the voids within the knit. So make sure
you are working with an appropriate needle before starting any stitching
on a baby onesie.
I
hope you like this and it is helpful for those of you who want to make
stylish onesies for babies. If you are interested in the chick design,
please contact me though my blog: Machine Embroidery Geek .
THANK YOU JULIE for the excellent tutorial!
Smiles,
Kelly
THANK YOU JULIE for the excellent tutorial!
Smiles,
Kelly


How fun! I have a wee one coming and I hope to get some good sewing in!
ReplyDeleteWonderful tutorial Julie. I too enjoy doing machine embroidery on baby onesies. I have fun creating them to go into baby gift baskets for Operation Homefront (go to young mothers that deliver when their husband is away in a war zone). Love your cute bird design. So cute. Difficult to find designs of an appropriate size for onesies. Maybe you could come back and talk about scale for what size designs and stitch count are good for onesies.
ReplyDeleteSewCalGal
www.sewcalgal.blogspot.com
Hi Julie! Thanks for visiting here! Best wishes with your endeavors! I wonder what city you are in? I didn't see anything on your site as to what part of the country you're in and just curious :)
ReplyDeleteWhat a great tutorial. I have stitched several onsies for my little guy and look forward to stitching them for his little brother too.
ReplyDelete