Announcement!

I Have A Notion blog and store have moved to:


the store can be found at


There is a much easier to navigate store, with new items. The blog has its own page as well... new content too.

The blog is now at www.ihaveanotion.com/blog

Please come and visit!
Showing posts with label MIstyFuse. Show all posts

Thursday, November 25, 2010

Quilting By Design - Sizzix and Westminster's Fabric Cutting System

Edited11/26/10 - Replying to questions asked at the end of the post.

Quilting by Design

I find it strange that people are still saying they don't know Sizzix and Westminster Fabrics have teamed up and have a Fabric Cutting System - Quilting by Design.  Especially since IHAN wrote a Product Review.  I guess people are waiting for Oprah to write a review!!!  Remember I beat Oprah to the punch with the Velocity 50 by Reliable.....true!!!  She doesn't have time to do her job and my job too :)
The Big Shot is pictured below with some of the newest Quilting By Design Dies.

I visited their booth at Fall Quilt Market 2010 in Houston.  Some of these photos are from their booth there and some are from my files.

The Big Shot is pictured below with some of the new Quilting by Design Fabric Cutting Dies.


The newest Fabric Cutting Dies are in the process of being added to the IHAN website.

The Big Shot Pro
Since I've already reviewed the Big Shot and Big Shot Pro I won't repeat all the details here.  You can click on the link and read the review.

I made a huge, gigantic, enormous mistake when I was organizing my creative space.  I took those scraps and disposed of 75% of them.  I know....just plain stupid!  Well....lets not be-labor the issue.
Here is a pix of a larger scrap I did not discard.  I'm going to show you some pix of some of the things I've done recently using my Big Shot Pro and my Big Shot (yes I own both....the Big Shot is to travel with and loan to our charity quilters locally).
This is my Big Shot Pro (aka the muth-ah of all cutters..lol) I took some strips of Batik that I had and made 5" squares to use as signature squares for a signature quilt.  I don't like cutting and sewing alone....these little buggers you see keep me company.
This is my Big Shot (aka little booger) and I was taking some scraps to make some fusible appliques to adhere to Tea Towels that I'm giving to a friend who has recently moved.
I use all sorts of scraps....who cares if Thomas is in the way....depending on the die you use....no one will be the wiser :)

I won't repeat that I'm a visual person again for the 10,000 time....I'll just show you how I choose to label my dies:


I tape the package insert to the top of the die so I'll see which one it is without having to look at the side of the die.  By the way, did you know the Big Shot and the Big Shot Pro will take AccuQuilt Dies?  100% TRUE.....any AccuQuilt Die that is 6 inches wide or smaller will fit into the Big Shot and the Big Shot Pro will take all the AccuQuilt Dies including the Studio Dies. 

Sizzix carries a Platform and Shim to raise up the AccuQuilt Dies but I use my small Omnigrid Cutting Mat and it works just fine for me.
I made all of these fusible applique shapes with my Sizzix Dies (the white show flake is batting).  Before I cut my fabric I use Mistyfuse on the back of my fabric so once it is cut I can just fuse it down.  I prefer Mistyfuse because it is light and it does made my appliques stiff.
These were just some I made from scraps for the fun of it.  I wanted to show you how nuts I can be....sometimes I just cant stop and I just keep layering them up on top of one another just to see what the look like.  I also use the fabrics from around the shapes and use the interesting shapes to build other designs.  If one of you would devote yourself to maintaining my business, kids, husband etc....then I could spend all of my time blogging and you could see everything.....any volunteers? I didn't think so :)
I like this one....and I want to make lots of them and put them around a center focal point.


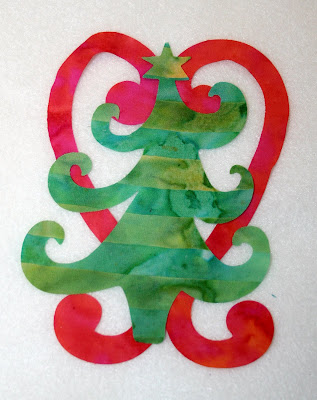
I wondered what a Christmas tree would look like on top of the heart.....

Then smack a big ole flower on top of the tree!!!  Gotta love it.

Since many of the Sizzix Dies I use are also for Scrapbooking they have small details that sometimes connect.  I like to carefully trim those areas away.  On the left are scissors I own and use.  On the right are how they look in the package.  They are all excellent scissors.

DovoSolingen
Jackpot Scissors made by Famore Cutlery for Simplicity Creative
Omnigrid Needlecraft Scissors


Oh and did I mention,

Sizzix has a brand new electric Cutter - The Vagabond, inspired by Tim Holtz.  I hear it is the mega cutter of all times.  I'm excited about the Vagabond because many people I know who own the Big Shot and the GO! Baby say their hands, arms and shoulders start to hurt after cutting lots of fabric.  There are also those who can not turn the crank on the other cutters because of Arthritis and other funky things that happen to hands.....now they can cut fabric all day and night without any problems :) 

Check out the YouTube Video for the Vagabond :


Just to be kind to all of those folks who get funky things going on with their hands and can't use the manual fabric cutters....I'm going to offer a FREE Sizzix Applique Die of my choosing to anyone who buys a Sizzix Big Shot, Big Shot Pro, or a Vagabond Cutter from IHAN on or before Monday, November 29th, 2010.


You might want to see what Patsy Thompson has made with her Sizzix Dies!!
Just Click Here
and Here
and Here too :)

See, I told you they are cool....and just add some Patsy Thompson magic stitching to the mix and you have Incredible Designs :)

Smiles,
Kelly

EDITED HERE:

Questions asked:
1.  Will the Vagabond cut several layers of fabric?
Answer:  OH YEAH BABY.....that mega cutter cuts chipboard and a little birdie told me someone fed it two and three layers of chipboard to see if they could jam it.....they did not jam the machine and it will void your warranty....but that lets you know it will easily cut through several layers of fabric :)

2.  Do I have an exact delivery date for the Vagabond? 
Answer: No, I was told they are currently shipping so I'm guessing it won't be long but I don't have an exact date.

3.  Will the AccuQuilt GO! and GO! Baby take the Sizzix Dies?
Answer: No they will not work in the AccuQuilt Cutters and if you try it and jam your machine, your warranty is voided so don't do it....even if you think it "might" fit....trust me....I've done it and your cutting mat will curl and you could easily break the handle off.

Tuesday, November 9, 2010

Roc-Lon Multi-Purpose Cloth - Quilt Market 2010 in Houston, TX

Going to Quilt Market is more than just seeing what is new, for me it is a reunion of friends.  My face lights up and my heart does too when I find my friends in their booths and some of them wandering on the floor.  I feel privileged because my work is about walking the floor while many of them work their booths and don't have the opportunity to walk around and meet others.  Darlene and Steve from Rockland Industries are some of the friendliest folks I know.  I'm always greeted with a smile and Darlene has started to spoil me with a cup of coffee!!!  I can not think of a friendlier community to work in honestly.

I met Steve and Darlene in Pittsburgh for Spring Quilt Market 2009.  I had no idea what Multi-Purpose Cloth was and honestly didn't care either.  But Steve was so friendly and took his time to educate me....I said thank you and walked off.  Then I ran into an artist who was demonstrating mixed media techniques and I asked her if she knew about Roc-lon Multi Purpose Cloth.  She said no; so I ran over to Steve and told him I thought he needed to meet this Gal because she was a mixed media artist and she might benefit from knowing about the cloth.  I keep coming up with more and more ideas for using the Multi-Purpose Cloth because I find it to be very interesting and versatile.
This is an old photo of their booth.  I held a Roc-lon Multi-Purpose Cloth Challenge  on the IHAN blog last year and I felt badly that I had asked everyone to make something/anything from a piece of Roc-lon Multi Purpose Cloth and I didn't make a thing.  So the night before I thought I better make something....anything...small of course.  I picked up my piece of cloth and thought to myself, "it is flexible and soft what can I make that is small, flexible and soft?"  The first thing that came to my mind was a baby booty.  So I whipped one up quickly.  When I say quickly....I mean quickly.  Since it was only supposed to be for the photo I didn't even bother to finish the bottom correctly.  I'm sooooo bad.  I used some Mistyfuse and Art Paper to the Multi-Purpose Cloth and cut out the shape of a booty.  I took it with me to Houston to give to Darlene as a gesture of ....insanity....I guess.  I was so embarrassed when she asked if I would leave it in their booth.  I agreed but begged her not to let anyone pick it up.  I had signed the bottom and it was not finished ....could you just die?  I was told that the folks from Michael Miller Fabrics came by and saw it....they liked it.  If I could have dug a hole and crawled in I would have.

I still cringe......except for the last part of the story.  I heard that someone is manufacturing baby booties from the Multi-Purpose Cloth now.  How cool is that?  What a serendipitous chain of events.


This year I took my camera strap to show Darlene and Steve.  Because the Multi-Purpose Cloth is flexible and soft I used it in the camera strap I made the night before going to Quilt Market in Minneapolis.  I guess I could brag that my work has been shown in Houston....but only to those who have no clue what I'm talking about....ROFL :)

Fast forward to 2010 Fall Quilt Market in Houston now :) 
Rockland Industries had an artist demonstrating in their booth.  Her name is Cynthia Davis and she was using a stencil to embellish a large piece of Multi-Purpose Cloth. 


She used a simple template and dobbed paint over the entire surface.  Below you can see a photo where she painted on every other row.  The ideas are limitless!!!  I think that is why I'm fascinated by the Multi-Purpose Cloth....it is so versatile.  I've read a blog post where people could not afford a movie projector screen so they used the Multi-Purpose Cloth.  Very smart people!!!
 
This is a photo of the stencil Cynthia was using. 
I really, really, really....did I say really....I meant to say REALLY like the texture Cynthia added before she painted the Multi-Purpose Cloth here.  See what I mean....the ideas are limitless!!!
I think this is an excellent idea for decorating that would be cheap and portable.  Get some Panel Track, like blinds or shades come on (you know me....I'd be recycling one from the Salvation Army or someones trash) and attach several panels of Multi-Purpose Cloth.  Prior to hanging them you could use paint, fabric, art paper, stencils, Mod Podge and old photographs, children's art, significant events in the newspaper, ....anything your mind can think of ....and decorate the panels.  Then you can move the panels back and forth or leave them in a series.  I like the idea of hanging several tracks and creating depth in the scene you create.  The best part is when you get tired of it, just roll it up and put it away....make something something else :) 
If I were artistically talented I would have painted a some Multi-Purpose Cloth and made a pair of wild chaps and worn them to Market in Houston.  After all....its Texas....anything goes in Texas right?
Thank you for reading!!!  I love reading the comments that you post.  I'd love to hear what your ideas are for using Multi-Purpose Cloth....let your imagination run wild....this is a virtual Texas here on the IHAN blog :)  LOL
Smiles,
Kelly

Wednesday, April 7, 2010

Day 23 of 30 Days of Giveaways - Mistyfuse

IHAN's 30 Days of Giveaways
Anniversary Celebration
Day 23 


No I've not lost my mind (well....maybe a little)!!!   I do remember posting Mistyfuse previously....but did you know Attached Inc. is giving one package away for three weeks and then an entire 100 yard roll to be included in the IHAN 30 Days of Giveaways Grand Prize? 

I have read the comments that were left on the previous post about Mistyfuse.  I was surprised to hear how many people had not heard of Mistyfuse.  It is wonderful for appliquĆ© but also for many other projects as well.  You can use it to fuse paper, tulle, silk, threads, yarns, and so many more mediums.  Lets say you want to make a  cool gift or wall hanging.  You could fuse some fun threads to the top of  paper, fabric, Roc-lon Multi-Purpose Cloth, cardboard, you name it.  Just remember you will be using an iron to fuse it so watch your temperature with certain fabrics and papers etc. 

I was fortunate enough to receive one of these note cards from Sue Bleiweiss after I left a comment on her blog.  That is where I got the idea for making fun collages, wall hangings and note cards.  Check these out:


Sue used Mistyfuse on the card and put paper flowers and some decorative threads and fused it.  Don't you know I've been keeping my eye out of interesting things to fuse to note cards myself.  Just too much fun to pass up.  You could make an entire set and give them to a friend as a gift (oh...that would be me too :). 

Here is the skinny on Mistyfuse for those of you who missed the previous post:

Use paper-less Mistyfuse for all weights of fabric from velvets and cottons to delicate tulles and organzas. It's a dream to work with—it handles well, is incredibly sheer, doesn't add bulk to your fused piece and bonds firmly once cooled. And since there is no added adhesive, it will never gum up your scissors or quilting needles. Each package comes with simple instructions for easy fusing with no waste.

Use Mistyfuse Black with any fabric or with tulles and sheers to create shadow and other special effects.


In accelerated aging studies, exposure to UV rays have been shown to cause fusibles to tan (darken). Especially on light colors, sheers or other light weight fabrics, and surface use, tanning may read as a color shift or dark spots. But now there’s Mistyfuse Ultraviolet! Mistyfuse Ultraviolet is specially formulated with an effective retardant to protect against the tanning effect of UV rays - without sacrificing any of the inherent Mistyfuse qualities you expect and trust. Mistyfuse Ultraviolet is white and fuses clear.
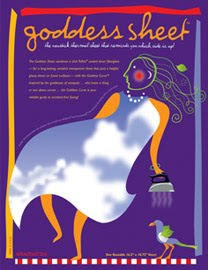
Since so many of you had not heard of Mistyfuse I thought I'd let you know about another very interesting tool from Attached, Inc. the Goddess Sheet.


When those of you who are new to Mistyfuse begin using it, you might just be ticked if I don't tell you about the Goddess Sheet.  I don't want any angry e-mails saying I've been keeping all the cool stuff to myself...so here is the skinny on the Goddess Sheet.
The Goddess Sheet combines a slick Teflon coated sheer fiberglass — for a long-lasting, nonstick transparent sheet that puts a helpful glossy sheen on fused surfaces — with the Goddess Curve™. Inspired by the goddesses of antiquity … who knew a thing or two about curves … the Goddess Curve™ is your reliable guide to accident-free fusing. The Goddess Curve is there to help you dedicate one side of the sheet to your iron only and the other side to contact with fusible. The glossy sheen is there to make it obvious which side of your fabric has the Mistyfuse on it (since with Mistyfuse it can be hard to tell!) Designed to be used with fusible, the Goddess Sheet is also suitable for all types of crafts. Size 16 1/2" x 10¾”
One of the really nice things I like about the Goddess Sheet is that it has a curve along one corner so you know which side of the sheet is up.  I can't tell you how many times I've gotten fusible on my pressing surface, my iron, or on other pieces of fabric because I didn't know which side I had used previously.  Now I always know which side is up and I don't have a frustrating mess.  The other really cool thing I like about the Goddess Sheet is that I can see through it.  That is really helpful when I'm fusing pieces in layers and want them to be in place before I fuse them (geez...I've done that too....fused a piece only to have to pull it up because it shifted and I did not realize it).  So now you can't say I didn't tell you about another very cool tool that I like.

Back to the giveaway!!!  If you would like to be the lucky IHAN blog reader to win a wonderful package of Mistyfuse you need to leave a comment on this post.  Since I've shared some insights about Mistyfuse not just being for appliquĆ©, I'd like you to leave a comment telling us what sort of other cool things you would use Mistyfuse for in some of your other creations. 

Thank you again Attached Inc. for joining IHAN in celebrating our First Anniversary!!

Smiles,
Kelly

Saturday, March 27, 2010

Day 12 of 30 Days of Giveaways - Mistyfuse

IHAN's 30 Days of Giveaways
Anniversary Celebration
Day 13 Giveaway
I am so surprised every time I hear someone say that they have not heard about Mistyfuse. If this is the first time you are hearing about Mistyfuse, boy are you going to thank me.

The official description for Mistyfuse:
"My" description of Mistyfuse:
Use it...trust me...you won't be sorry....excellent fusible that is light and does not make your fabrics or papers hard or stiff....they stay nice and soft...(stop thinking about Charmin Toilet Paper will ya.....it is soft but not nice and thin like Mistyfuse)
I met Iris Karp (Owner of Attached Inc.) in Pittsburgh last May. She demonstrated how Mistyfuse works and I was fascinated. I'm sure she thought I was absolutely nuts because I carried the sample she gave to me all around for the duration of market asking people if they were familiar with it. I sent everyone I spoke with over to Iris so she could show them how cool it is. I'm surprised Iris did not call the police and report a nutcase on the loose. (No one here will be surprised because all of you know when I learn about something that is really neat and works like it says it will.....I tell everyone I know. )

I know you want to see some projects that have used Mistyfuse.  Here are some examples of things Sue Bleiweiss has made using Mistyfuse:


Sue is a very talented artist and quilter.  I really appreciate her allowing me to use her photos from her projects for this post-THANKS Sue!!! 

Three Creative Studios   (Sue Bleiweiss, Terri Stegmiller, and Vicki Welsh) have put an excellent Mistyfuse Tip Sheet on their site.  They also have the following free tutorials:


THANK YOU Three Creative Studios for the excellent tutorials :)

Here are some of my customers e-mails with their thoughts on Mistyfuse:
Mistyfuse and I have gotten to be great friends, and it is definitely my preferred fusible. I had avoided using fusibles because they made my quilts stiffer than I liked, but Mistyfuse converted me. It is so light I have even used it under organza. My latest project involved small narrow circles and ovals of fabric, and Mistyfuse made it possible to easily translate my vision into fabric; if I had had to pull paper off all those narrow pieces of fabric, I would have gotten very frustrated with the process. It gets an enthusiastic recommendation from me.
Madalene Axford Murphy
workingwall.blogspot.com
Hi Kelly,
Mistyfuse is a great product. Recently I made ATCs using layers of candy wrappers and Misty Fuse was so easy to work with to get the look I was hoping for.

Jenny Morlock
quiltcrazygaljennalouise.blogspot.com
MJE's Bag Tag Tutorial is posted on the sidebar of my blog. I make fun Bag Tags using Mistyfuse. They make great gifts and I love them to put on all my bags including my co-workers backpacks.


I should also tell you that Mistyfuse comes in :
Ultraviolet-
In accelerated aging studies, exposure to UV rays have been shown to cause fusibles to tan (darken). Especially on light colors, sheers or other light weight fabrics, and surface use, tanning may read as a color shift or dark spots. But now there’s Mistyfuse Ultraviolet! Mistyfuse Ultraviolet is specially formulated with an effective retardant to protect against the tanning effect of UV rays - without sacrificing any of the inherent Mistyfuse qualities you expect and trust. Mistyfuse Ultraviolet is white and fuses clear.

And Black-
Use Mistyfuse Black with any fabric or with tulles and sheers to create shadow and other special effects.
To have a package of White Mistyfuse shipped to the address of your choice, you need to leave a comment here telling us about your experiences using Mistyfuse and if you have not used Mistyfuse please tell us what you intend to make using Mistyfuse.

For extra entries please send photos of projects you have made using Mistyfuse with a description and you review of Mistyfuse to IWantToWinAtIHAN@yahoo.com

Photobucket

But WAIT...there is MORE....Iris Karp is going to give away one package of Mistyfuse each week for three weeks....so watch for more posts....and the last week she is going to giveaway a roll of Mistyfuse 12 in. x 100 yards in the Grand Prize Drawing. To learn more about the Grand Prize Drawing....click here :)

Thank You  Iris Karp (Attached Inc.) for your generousity and for giving me the idea of having a Grand Prize Drawing !!!

Smiles,
Kelly

Monday, June 22, 2009

"MJ's Bag Tag" Tutorial by Kelly Jackson


I remember promising some readers that I would post a tutorial about making Bag Tags. That was months ago. Well....I finally did it. Being a visual learner I probably took way too many pictures. For those of you who only require a few, hang in there! :)

The pattern was designed by my dear friend Mary Jane.

You will need:
- Timtex
-Fabric 3 1/2 x 12 inches
-Fabric Strip 14 inches by 1 7/8 (if you are using the binding machine otherwise use the width you prefer)
-Clear Plastic 2 1/2 x 4 1/4 inches - you can get this at Wal Mart (if they have fabric) or JoAnn's.
-MistyFuse


Timtex cut 2 1/2 x 11 inches


Fold Timtex  in half


Cut the tips off I used the Olfa Ruler


Tips cut off


Fabric 3 1/2 x 12 inches (Amy Butler Fabric)


I use Best Press and iron my fabric. I like my fabric to be wrinkle free.


Then I cut a piece of MistyFuse just larger than my Timtex (I eyeball the measurement). It might be difficult to see in this picture but if you look closely you can see it is about 1/4 inch larger all the way around.


Then I lay my wrinkle free fabric down, put a layer of MistyFuse and then my Timtex.
I trim the corners of the fabric off - freehand-does not need to be exact.

I'm using "The Applique Pressing Sheet" because the MistyFuse does not stick to it. I flipped the fabric sandwich(fabric, MistyFuse, Timtex) over and pressed. I used "Hot Stuff Harriet" because she does not steam :) I love her....heavy and cheap ($3.00)


Now I flip it over and press the sides in first. Next, I press down the ends. The extra MistyFuse is not visible here (it is wonderfully thin and leaves you fabric soft not stiff) but that is what holds the fabric in place. No need to use more or cut more it is already there.
Then I press in the "ears"

I fold it in half and press again.

This is how I make my straps. You can use fabric to match, coordinate or clash :) You can also use ric rac or ribbon (anything your heart desires:)


I use my new Bias Tape Maker to make the straps. I cut my fabric 14 x 1 7/8 inches. You can do it the old fashion way and fold your fabric in half, then fold the edges in and press. You can use the Bias Tape tools by Clover too. What ever works for you. This is just how I do it.


I feed it around the roller (I usually make 4 or more at the same time so I make lots of bias tape and I don't cut it on the bias because it is only being used for tag straps)


Just lay the fabric over the roller.


I cut it on an angle so it fits through the tip easier.


I use my Awl aka "Pokey Tool" to get my fabric through evenly. You don't have to...I just do...


As soon as it is fed through I remove the top of the Bias Tape Maker


Top Removed....fabric comes across the plate and over the end roller.

Note: you need to get the fabric over the end roller.


Replace the top, turn it on-it heats up very quickly. (this picture was taken out of order. I take mine off first before feeding it but I also turn mine on and do it carefully. If you follow my lead....you can get burned....YIKES. Danger Will Robinson!!!!


Waaaahhhhhh Laaaaaahhhhhh...you have bias tape :)

Subliminal message: Do not see the mess in the background.....do not see the mess in the background.....do not see the mess in the background.....


I fold it in half and stitch down both sides.


The stitches should be even....often my boys are playing next to me and I'm talking to them and not watching what I'm doing exactly. Then you get a wobbly line....I'm not thinking the bag handlers will notice....do you?


I tuck my strap in half and edge the tips down into the Bag Tag about 1/2 inch.


The next few pictures relate to the cutting of the plastic. This is just how they got uploaded....You can cut your plastic at the same time you cut your fabric.


Because I had such a hard time seeing the edge of my plastic when I cut it I use these Q Tools Cutting Edge Strips on the edge. You can see here that I place it on the edge of my roll of plastic.

Now I can see where I'm cutting. This just makes it easier for my. You might not have a hard time seeing the plastic. I have these strips for my rulers and they are re-usable so I use them on my plastic too.


Back to the Bag Tag Sewing

First I stitch right along the edge of the strap securing it in place. I usually go forward and backward and forward again. This secures the strap into the Bag Tag.


Just as I turn to come down the side I place my plastic on top of the Bag Tag. It is a little difficult to see here but that is what I've done. I use my walking foot because it glides over the plastic and does not get stuck. I've used my 1/4 inch foot and it sticks to the plastic.

I continue stitching all the way around and then clip my threads. Then I put a business size card behind the plastic.

You can make an assembly line to make several tags at once. They make really great gifts. Everyone I've ever given them to has told me how much they appreciate them. I put them on my boy's back packs for school, lunch boxes, gym bags and my luggage. I have made them in smaller sizes for gift tags and then they can use them for their bags afterwards.

This tutorial took quite a bit of time to do the pictures, upload them, write out the tutorial etc etc etc. I did not share the pattern (which took MJE time to create) without her permission. I ask that you not copy my instructions without my permission. The pattern and instructions are being shared freely and not intended for sale or profit.


If you get stuck or need more information feel free to e-mail me at IHaveANotion@yahoo.com. If you need any of the items used to make Bag Tags check out www.IHaveA-Notion.com


I would love to see your Bag Tags. If you make some please, please, please send me pix to share.


Smiles,
Kelly

Translate

Related Posts Plugin for WordPress, Blogger...