Announcement!

I Have A Notion blog and store have moved to:


the store can be found at


There is a much easier to navigate store, with new items. The blog has its own page as well... new content too.

The blog is now at www.ihaveanotion.com/blog

Please come and visit!

Friday, April 5, 2013

Project Runway Hospital Edition and Party a la IHAN® Style

If you have ever been in a hospital for any length of time than you know what "hospital brain" means.  It is extremely boring here and the only fun is the fun you make or bring.  If you have been following along you know that my mother has been in the hospital since Feb. 25th......you also know that there are times I'll do what ever I can to make life a little more fun or manageable.

Last evening I hosted a PARTY here in room P651 and the staff were invited to attend.   Since it was a "Party" we definitely needed some "Party" attire....right?  Right!!!  That is when I decided the theme of the party would be "Project Runway Hospital  Edition a la IHAN® Style (not to be confused with Gangnam Style) .  To get our mojo workin' I searched the room for some materials to make an appropriate party dress.

I found one of those blue disposable gowns:
And started to work......
I cut the "skirt" off of the blue dress and took a running stitch along the waistband so I would have a lovely gathered waist band.
I was meticulous in spacing the stitches so the skirt would drape elegantly over the waistline of  the finest models who would be wearing this Haute Couture Frock.

Notice this lovely skirt has some fabric draped in front that adds just that special touch of class?  Since I'm always up to date with the latest in Haute Couture I decided our party frock needed something interesting and exciting that would draw the eye......so......
I looked around the room and found these lavish embellishments.  You know that fashion model would be so green with envy....poor girl....thinking she has it all....but notice she doesn't have the lavish purple embellishments?  Bummer!

 The Party Dress was coming along, but what it really needed was some enrichment, that special touch that adds pizzazz to the ensemble.

7:00pm rolled around and the RN put the Official Party Banner in place and we were ready to ROCK this House Hospital.
Oh yeah baby.....this party ensemble was complete with a turban-embellished toilet paper bow.  I was feeling way too sexy for my shoes...and was in desperate need of some real  knock your socks off shoes.....

I looked high and low but apparently I forgot to pack these sexy things.....bummer ay?
I was still able to get-down without those diamond-esque kickers... YES...you know it baby!
Mom rocked out too!  My momma isn't new to the Harlem Shake....she invented it!  She was just a shimming and shaking to some Motown music.  Here in D-Tr-oit, we know how to get-it-on-down....I grew up here so I know of what I speak.
 
(photo credit)
 The only person we were missing was Don Cornelius ....and he would have loved this party!

We caught the RN Floating, Gliding and Sliding...Bruno would have given her a 10 for sure!
Popping and Locking was none other than the Chief Resident....oh yeah baby....movin' and a groovin'.  
 
 The Doctor was not going to be out done by his Chief Resident or the RN, so he let loose with a few street moves of his own.
After composing himself, there was a photo with "The Designer."


No party is complete without Hors d'oeuvres.
 
The Doc provided  Hors d'oeuvres included a  Chocolate Carmel Ice Cream Bar...no one can say we don't know how to Part'ay!

Smiles,
Kelly
Disclaimer: There may have been some embellishments added to this post....not confirming nor denying....just saying there is that possibility.

Wednesday, April 3, 2013

Free-Motion Quilting, with Patsy Thompson

SewCalGal is delighted to be back as  a guest blogger at IHAN today.   

Kelly introduced me to Patsy Thompson, Free-Motion Quilting Expert, Quilt Designer, Teacher, Author, Doctor and all around amazing woman.  A few years back, Kelly knew I was interested in learning/improving my free-motion quilting skills.  She recommended Patsy's videos for free-motion quilting to me and needless to say, I was I've been delighted with all of Patsy's DVDs ever since.

I enjoy watching Patsy's DVD again and again, and even take them with me when I travel.  My attitude is "If I can't take my sewing machine with me, when I travel, I want to feel like I'm working on my quilting skills by watching Patsy's DVDs".  

Patsy's free-motion quilting  (FMQ) videos are high quality, easy to follow, well organized and will take you thru the steps to help you create spectacular free-motion quilting.  She has a well rounded collection that are grouped into excellent categories with corresponding titles:

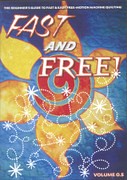
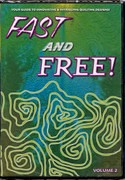
FAST AND FREE

SewCalGal recommends the Fast and Free DVDs for those new to FMQ. Patsy goes thru the basics and will help a beginner gain confidence, learn great habits, and trouble shooting skills.  You'll soon be doing FMQ on your own projects, after watching these DVDs and be amazed how beautiful "your" FMQ looks!

DVDFastandFreeVolume.5 FastandFreeVolume2 


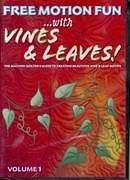
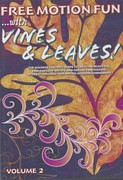
VINES AND LEAVES
SewCalGal recommends the Vines and Leaves DVD to those interested in FMQ, from all skill levels, interested in creating a variety of styles using vine and leaf motifs.   Patsy covers basic vines and leafs, as well as many signature motifs that are easy to create and really look great on your projects too!  

FreeMotionFunwithVinesLeavesFreeMotionFunWithVinesandLeavesVolume2

FEATHERS
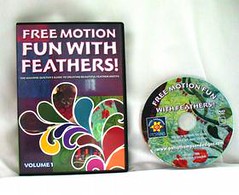
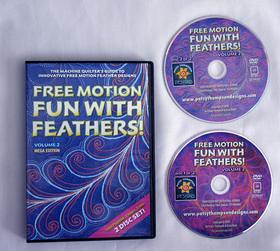
SewCalGal recommends the Fun with Feathers and Feather Adventure DVDs for confident beginners and those with advanced levels of FMQ experience that are interested in learning a variety of styles for creating spectacular feathers using FMQ.   Patsy does an excellent job covering basic feathers, but she also has many signature styles of feathers that you can easily apply to your projects, as well as make into your own style.  Her techniques for creating feathers have been one of the easiest for me to learn and I'm sure you can master them too, with her DVDs.


FreeMotionFun1 productimage-picture-free-motion-fun-with-feathers-volume-2-24_t280 FreeMotionFunWithFeathersVol3 PatsyThompsonFMFwithFeathers4 FeatherAdventuresVolume1


HYPERQUILTING
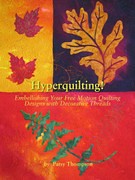
SewCalGal recommends the Hyperquilting manual to those that are confident with FMQ and want to learn Patsy's two step technique that creates amazing visual impact on your projects.  There are various FMQ Experts that teach a two step (two different threads) style of FMQ, but Patsy's "Hyperquilting" is one of the best I've ever seen.  You can apply this technique to your projects for every day quilts, art quilts, as well as heirloom quilts, but I'd highly recommend you gain expertise on this technique' if you want to "dazzle" quilt judges and have fun stitching award winning quilts!

Hyperquilting

I hope you can tell why I trust Kelly when she recommends product to me, as well as why, like Kelly, SewCalGal can happily recommend Patsy's wonderful FMQ DVDs and Hyperquilting manual.    Don't forget you can find all of these wonderful products at IHAN.  You may want to start with buying one, but you'll soon find you'll want another for a Birthday Gift, Anniversary Gift, Christmas Gift, or some other gift.  So be prepared......you'll want them all.  Of course, I've recommended to Kelly that she come up with a special bundle collection of Patsy's DVDs (after all Patsy's DVDs are better than the James Bond DVD collection)!  

And, while Kelly is currently with her mom in the hospital, IHAN is continuing to ship customer orders on a weekly basis.  The IHAN team is helping to fulfill orders.  So, don't hesitate placing your order with IHAN.  


If you would like to learn more about Patsy and her designs, you can find her at: 


 Post  written by SewCalGal


THANK YOU SewCalGal....excellent review of Patsy Thompson's work!!!

For those of you who are local to the Toledo, OH area, Patsy also hosts classes at her studio CLICK HERE for more information about her classes and studio.   I hope you don't miss Patsy's free tutorials on her website....they are excellent.

Smiles,
Kelly 

Monday, April 1, 2013

Hope You Had A Wonderful Easter

This Easter was much different than any we have ever had in the past.  The boys....including Mr. McSteamy colored eggs today.  My memories of coloring Easter eggs as a child did not include any cyclopes or men with mustaches...perhaps I had a sheltered childhood? 

My Easter was spent with my mother who was taken back to the hospital from the rehab center. Apparently the staff at the acute rehab were not prepared to handle some of the medical issues my mother has.  For her personal safety, we had her transferred back to Henry Ford Hospital in downtown Detroit. 

One of her external tubes became clogged then dislodged so she was very ill.  Last evening and the evening before were very difficult for my mother.  My sister and I stayed with her and somehow we all managed to get several good laughs in during the midst of all this stress.  Laughter can be the best medicine sometimes!


I was determined that one way or another my mom was having shower today.  If I had to hook her bed to the back of my van and drive through a car wash....well so be it! 

The good news is, I didn't have to go that far.  After assisting her to get up she actually walked (with support) all the way into the bathroom.  I was jumping for joy....it was a small miracle in my book.  She was certain she couldn't do it and yet there she was walking and tolerating being showered without getting ill.
My clean mother.....LOL.

 My sister and I could not believe how good she looked....and with no makeup.

The wonder and magic of living in the moment!  Who knew  I would experience such joy and laughter in a shower with my mother and sister?  Not something I could have dreamed up.....yet there we were.  I have such intense gratitude for these experiences and it has made my Easter special and one to never forget.

I'm not sure the nurse and the nurses aids will ever forget us either.  My sister and I were waring the blue plastic gown shields so we wouldn't get soaked and the aide walked in and started laughing and asked what was going on. 
Yep....there we were in our undergarments and a blue cape that is open in the back....ROFL.  All I can say is that it worked and I had a ball laughing and so did my mother and sister.  Mission accomplished!  Sometimes a woman has to do what a woman has to do....so we did :)

Hope your Easter was wonderful too!

Smiles,
Kelly

Friday, March 29, 2013

Welcome Guest Blogger Julie Griffey

When Julie offered to do a guest post for IHAN® I went over to her website and saw she had some great tutorials.  There are so many people that I know who are expecting grandchildren soon that I thought this tutorial would be a great one to share.

Julie Griffey from Machine Embroidery Geek

I am very thrilled this week to be a guest blogger here at I Have a Notion®. (Thanks, Kelly!)  My name is Julie and I have a blog as well with a slightly different focus: machine embroidery and applique. You can check it out at  Machine Embroidery Geek


Today I am going to show you how to make a cute little applique baby onesie with a little chick design.  I have done a bit of applique on baby onesies in the past, and while it is a bit challenging to stitch within such a tight space, it's actually not as difficult as you might think.

For this project, I was inspired by the piece of fabric I purchased the other day. The fabric has a dainty little chick footprint design on it.  I thought it would be cute to digitize a little chick applique and then use the chick footprint as the appliquĆ© fabric.

I begin the applique process by stabilizing the design area with an iron-on cut-away stabilizer fused to the inside of the garment.  Next I mark where the center of the design should land on both the inside and the outside of the onesie.
Next, I hoop a piece of sticky back stabilizer, scour around the edges with a pin to remove the peel away paper and mark the center of the hoop on the exposed, sticky stabilizer.  Then I turn the onesie inside-out and stick it onto the exposed sticky-back stabilizer, lining up the center point on the inside of the onesie to the center of the hoop marked on the exposed sticky-back stabilizer.

Now it's time to start stitching.  The first layer of stitching forms the chick's legs and then the placement line for the appliquĆ© piece.  When the machine pauses I lay down the applique fabric piece over the placement line that has been stitched out.  I don't spray any adhesive onto the onesie, I simply lay that applique fabric that has been  fused to a piece of Heat-and-Bond Lite (Kelly would use Mistyfuse to keep the onsie soft) onto the front of the onesie over the placement line. 
The next layer of stitching tacks down the appliquĆ© piece to the onesie.   When this is complete, I remove the hoop from the machine and with appliquĆ© scissors, trim the appliquĆ© fabric as close as possible to the tack down line without (of course) cutting a hole in the onesie.

Once the hoop is put back on the machine, I start the next round of stitching which puts the final satin stitching around the chick shape and creates a little eye for the chick.

One important note... when I am embroidering on any type of knit fabric, I am sure to use a needle that is suitable for stitching on knits.  Needles designed to work with knits do not pierce the fabric, but instead push their way through the voids within the knit.  So make sure you are working with an appropriate needle before starting any stitching on a baby onesie.

I hope you like this and it is helpful for those of you who want to make stylish onesies for babies.  If you are interested in the chick design, please contact me though my blog:  Machine Embroidery Geek

THANK YOU JULIE for the excellent tutorial!   

Smiles,
Kelly

Wednesday, March 27, 2013

Guest Post by Sheila Painter

Today’s guest is Sheila Painter, who belongs to one of my quilt guilds.  Sheila does a good job of introducing herself so....here is Sheila's contribution to keeping the IHAN® blog moving along :
 
 Sheila poses with four charity quilts she made, all strip-pieced.
 
I’ve been sewing since I was a little girl, but only quilting about nine years now.  I absolutely LOVE sewing quilts, and churn them out like crazy.  But I admit that, while I say I love quilting, I don’t really love the quilting part of the process.  As a matter of fact, there’s quite a bit I don’t enjoy:  pin-basting, applique, hand quilting, and hand sewing on binding.  But sit me at a sewing machine and let me sew bits of fabric together into quilt tops, and I’m in heaven.
 The speedy arrowhead pattern is a quick and easy design for a quilt.
 
So I was thinking about this recently, and realized that all the things I don’t enjoy about making a quilt are the parts that take a really long time.  I want to be quick and efficient.  I sew most of my bindings down by machine now, hire longarmers to quilt my quilt whenever I can justify the expense, and enjoy starting a quilt with orphan blocks so it will go together quicker.  If there’s a shortcut, I’ll take it.  Plenty of quilters like me have discovered wonderful timesaving techniques, like chain-sewing, fast-flying-geese methods, ways to sew blocks or borders with a minimum of pinning, etc.  We can buy kits where the pattern and fabric are all pre-chosen for us…. imagine that!  Then there’s the whole world of precut fabrics….strips, squares and triangles, and more…. already cut for me! 
 Sheila's orphan block quilt....I just appliqued them down on background fabric.
 
But fabric manufacturers didn’t come up with these timesavers just for ME….no, lots of busy, working people of today appreciate the convenience of buying fabric pieces all ready to sew together.  Kelly sells lots of time-saving notions on her website I Have A Notion (hint, hint!) to speed up the process, including those nifty machines that even do the cutting for us with dies!
 Here's a quilt-as-you-go I made, using my scraps.
 
What really got me thinking is, if we all love making quilts so much, why don’t we just slow down and enjoy the process?  The whole concept of making a quilt is cutting up fabric and sewing it back together into something beautiful, warm and cozy.  Why does it have to be fast?  Is my life really better because I use the leader/ender method when machine piecing to have my next quilt already begun?  Choosing a quilt pattern that sews together really fast might not be my best choice.  Was my goal really to finish three quilts last month?  Or would TWO have been enough if I didn’t shortcut my way through them??
 This one was made with strip-piecing, for my granddaughter on her first birthday.  It was the THIRD quilt I have made for the baby:  baby quilt, crawling quilt, and first birthday present!

Using notions that save time (which I Have a Notion has lots of) is a wonderful thing, so we should embrace them.  But let’s slow down and as they say, smell the roses.  I will make a special effort to put my personal touch on my quilts.  If it involves threading a needle, so be it.  Our quilts will probably outlast us by a hundred years.  Long after we’re gone, our ancestors will still enjoy the beauty and love that went into the quilts that were handed down to them.  They won’t notice or care if the quilts were made with shortcuts.  But they will appreciate that we enjoyed the process of quilting enough to make these lovely heirloom pieces.  I pledge to put more time and love into my quilts…..will you?
(Written By Sheila Painter, OH)

Kelly's Comments:
 
Well, knowing Sheila for the past few years, I have to say I was very surprised to read this post she submitted.  Sheila routinely brings anywhere from 2-4 and sometimes more quilts to our guild meetings for show and tell.  I've always had the idea that quilting should be a process, not necessarily quick....but a process to be enjoyed.  I'm not saying Sheils isn't capable of slowing down....LOL....I'm just looking forward to seeing what that means to her....giggles.  She may feel empty handed without all those quilts for show and tell.
 
What ever the time table you have for yourself....I do hope you enjoy the entire process as much as possible :)

Smiles,
Kelly

Tuesday, March 26, 2013

Announcing the Winner of the Anita Goodesign Special Edition Software


 I hope all of you had fun and learned as much as I did, if not more, from the IHAN® Embroidery Blog Hop sponsored by Anita Goodesign.  One of the repetitive comments that I heard from all the participants of this blog hop was,  how pleased they were with the well written instructions that are included in the Anita Goodesign collections.  The illustrations made it possible for me to make this angel without any troubles at all.  If you want excellence in your embroidery designs, I highly recommend the designs offered by Anita Goodesigns available at IHAN® .

There were so many highlights to this blog hop.  I'll start at the beginning, just in case you missed some of them.
1.  SewCalGal gave lots of excellent ME (machine embroidery) tips on day 1.  She has so much more experience than I do and I always learn things from her.  On day 5, SewCalGal offered more tips on using desgins and showed us the beautiful kitchen towels she made using Rachel's Recipes.

  2.  I also had a big "ah ha" moment when I saw Sew Cindy's post. She is doing the string piecing with left over fabrics and then adding some ME designs.  The Coffee design collection is perfect for making mug rugs (I secretly want to have those coffee mugs on the outside of a pair of mittens too...lol)  I really like her idea for a fast gift that isn't too expensive.  She also pointed out how she uses her "hera marker" and I have one but don't use it nearly as often as I could...so thanks Sew Cindy for the reminder :)

 3.  All Things Crafty blog went all out explaining how she made quilt labels with her Anita Goodesign Quilt Label Designs.  Definitely an excellent tutorial!  There is no excuse for not labeling anything now!  LOL :)

4.  Marjorie gave me re-newed hope that I too would one day own a finished Baltimore Album Quilt.  I am in love with her quilt and want one for myself.  Marjorie is a digitizer and has a great deal of experience so I also recommend you checking out her designs HERE.

5. Margaret, the not so average quilter, just blew my socks off with the Anita Goodesign Roosters.  Not only was I absolutely in love with the dish towels she had made, but I was bowled over by the wall hanging she made.  How can she call her blog, "The Average Quilter"....I just don't get that at all.  I vote we but a circle with a line through it over the word "Average" in her blog title.
 .
 6.  Cheeky Cognoscenti gave a most informative review of the software and went out of her way to make sure everyone could understand what she was doing.  EXCELLENT JOB!  I have to say,  I began to look at my curtains in a whole new light after seeing her tutorial on using Fantasy Birds as valances (see above)

 7.  Naturally Gene Black an Alabama Artist and Quilter,  gave another wonderful review and included tips I would have never thought of....I guess it is his artistic brain that offers such flexibility and interesting ideas.  Gene used Asian Quilt design to make a beautiful wall hanging for his cubicle at work.

And without any further ado....the winner from the IHAN® blog is:

Congratulations beaquilter!!!!  

Please send me an e-mail with your full name, address and phone number along with the Special Edition Design Collection you would like from Anita Goodesign.


Another huge THANK YOU to Anita Goodesign for sponsoring this Machine Embroidery Blog Hop!

AND Then there was the $25.00 Gift Certificate to IHAN® for those who shared the news about the blog hop.
 The winner is: Congratulations Quiltin Cntrygrl!!!


Please send me your e-mail address and I'll send you a $25.00 Gift Certificate to one of the most fun websites on the internet today.....I Have A Notion®  (Guess I'm feeling a little high from lack of sleep.)

Sleepless Smiles,
Kelly

Translate

Related Posts Plugin for WordPress, Blogger...