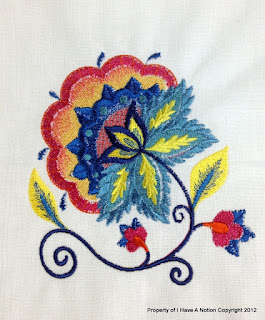
Announcement!

I Have A Notion blog and store have moved to:


the store can be found at


There is a much easier to navigate store, with new items. The blog has its own page as well... new content too.

The blog is now at www.ihaveanotion.com/blog

Please come and visit!
Showing posts with label Floriani Embroidery Thread. Show all posts

Saturday, May 12, 2018

‘Floriani Product’ …. in the wild!

Look at this.

The maker calls it a Butterfly Bowl. I couldn’t imagine what it looked like from the name… but she also sent a picture. Just beautiful!

Luna Moth Basket Susie Bierman

Lina took advantage of the ‘Clearance Sale’ and snapped up a bunch of the Floriani Variegated thread and sent the picture with permission to share.

The butterfly (Luna Moth) is Machine Embroidered, using the same thread top and bobbin so the back side is just as pretty as the top.

Still lots of Floriani in the shop…. and the price can’t be beat! HALF off!

Shop www.ihavanotion.com

More Later!!!  Beth

Thursday, May 3, 2018

and it Continues!!!

EVERYTHING in the store 50% off!!!

images
Featuring FLORIANI Thread

(Great for machine embroidery, longarm quilting or thread painting/sketching).


Beautiful sheen, 100's of colors

Thread

Don't wait some colors are getting low! and a few are gone!

I am a recent finder of the Floriani thread, and I have been playing with it on the longarm. I think it is a finer thread than Glide, which is a 40 weight thread, so it does not show quite as much, something I like. And by not showing quite as much the sheen is a little less as well, again something I like.

One of the other things of note is that Glide likes to untwist while traveling from the spool/cone to the needle, on my longarm, as I hear, also on many other longarms as well. The Floriani does not seem to do that!

SHOP

More Later!! Beth

Monday, March 18, 2013

Welcome to the IHAN® Machine Embroidery Blog Hop Sponsored by Anita Goodesign


Hello, this is SewCalGal back as a guest blogger today.  And, Jean is also helping out with this post too!

Kelly has organized a wonderful blog hop this week that we hope you'll enjoy.  Before I share insights with you, I do want to invite you to join us in wishing Kelly a Happy Birthday and hope all her special wishes come true!  SewCalGal and Jean also hope you'll leave a comment on this post to wish Kelly a Happy Birthday too!

happy birthday kelly copy


Time to talk about the blog hop.  Anita Goodesign is the sponsor for this wonderful hop and they have also donated prizes that will be offered on the blogs in this hop. Everyone is invited to join the fun this week and we encourage you to visit all the blogs for inspiration, tips, some tutorials, as well as more opportunities to win a great prize!


SHHHH....Kelly here.....
I snuck into this post, those girls thought I had my plate full (I have some of the best friends on this planet) but I just have to share with everyone what I made on Sunday for my Mom.  I choose the "Art Quilts" designs by Anita Goodesign for this blog hop.  
"Art Quilts" a Premium Design Collection from Anita Goodesign

I'll show you more of the designs later....now I'll share my process with you :)
The instructions for these designs come in booklet form as well as on the CD. The instructions were very easy to follow.  The recommended stabilizer is Floriani No-Show Mesh.  I hopped it with some muslin as suggested.
Then I put some batting on top of the No-Show Mesh, the machine basted it in place.  Then I laid the background fabric over the basting stitch lines.  (It doesn't get any easier than this.....really.)  
 Lucky for me, the software  indicates which colors of Floriani Embroidery Thread to use.  I just had to change a few based on the colors of fabric I choose for the appliques.  All of the thread in this design is Floriani Embroidery Thread other than the bobbin thread.
I use Wonderfil Prewound Bobbins when I do machine embroidery....I like the convenience.  Winding bobbins is not anywhere near the top of my list of fun things to do.
The quilting lines were stitched first and then an outline stitch showed me where to place the fabric for the background of the angel's wings.  After they were stitched down, I simply cut around the outline.
Taking photos of every step would have bored you to tears so I've jumped forward a bit.  I used silk for the dress and the skin on the angel.  
Knowing silk can fray, I decided to use some Mistyfuse and fuse the No-Show Mesh to the back of the silk.  I could have used the Fusible No-Show Mesh but I didn't have a package open at the time.  
It always seems that I am stitching a project when the local quilt shop is closed.  I didn't have any flesh colored fabric but fortunately I remembered I did have some small pieces of silk dupioni. 
Believe it or not, I actually got all the way through most of this design without any mistakes....up until step 30 something.  The thread color that was indicated was a dark brown and it said it was for an outline.  Thinking it was for the bird, I just put it in the machine and hit the button.  YIKES....in a minute or so I noticed the dark brown was outlining the hair.  I specifically made the angel with red hair and didn't like the dark brown outline.
The most difficult stitches to take out, in my opinion, are machine embroidery stitches.  I used my Famore Seam Rip and Famore Micro Fine Tweezers to remove that dark outline.  Where would I be without those tools? 
Here she is, a beautiful angel holding a dove....sans the dark brown outline!  
As promised, here are the other designs included in the Premium design collection, "Art Quilts."
 
The designs can be made into greeting cards, wall hangings, post cards, mug rugs or added into quilts....your imagination is really the only limit.

I hope you have enjoyed this little journey with me....I sure had a great time making this angel for my mother.

Now....back to post written by SewCalGal :)


Schedule for this blog hop that will share tips, tutorials, inspiration and oodles of giveaways:

Mon., March 18th 


          I Have A Notion® aka IHAN®- Kelly Jackson

SewCalGal

Tues, March 19th

Cindy - Sew Cindy
Trish - AllThingsCrafty.com
Wed., March 20th

Marjorie's Quilting Bee
Margaret - The Average Quilter
Thurs., March 21st

Rebecca Grace - Cheeky Cognoscenti
Fri., March 22nd

Gene Black - Alabama Artist
SewCalGal

And, don't forget today is sweet Kelly's birthday.  Happy Birthday Kelly!

SHHHH...it's me again....Thanks for the Happy Birthday thoughts....I've been bowled over by people remembering my birthday.  Sure does lift the spirits :) :) :)

If you leave a comment on this post you will have an opportunity to win a Special Edition Embroidery Software from Anita Goodesign.  (Value: $99.95).  Make sure you leave a comment on each of the participants blogs....there will be one winner from each blog!   Please join me in thanking Anita Goodesign for their incredible generosity.

THANK YOU ANITA GOODESIGN!!!!!

Smiles,
Kelly

Wednesday, May 9, 2012

Good Enough vs Perfection....do you struggle too?

I'm so glad I'm not alone!  Something just told me I'd be in very good company with my struggle to integrate these polarities.

Warning: Photo Heavy Post!  You know if I have not blogged in a few days that I have all these blogs posts and photos all stored up in my mind..  I was thinking about sticking a USB into my ear to see if I could just download my blog posts directly from my brain to the computer...that would be PERFECT!  (If anyone dares to e-mail me and tell me this technology is already available....I will flip out!)

I changed the layout of this quilt a bit...here is the new layout.  The Union Jack strip on the right is actually three separate pieces I cut from the bottom of the panel.   Joining the three pieces became a real challenge....how to get those darn things to join up was no easy feat....at least not for me.
 
Here are the two places that I joined them ....mind you...I put these together no less than three or four times. I used pins to line them up and I even went as far as to use double sided tape.  Look how badly they lined up.


What do you do in these circumstances?  Whens something isn't quite working out the way you want it to and you've sewn and unsewn over and over again?  I tried a glass of wine....nope...didn't work.  Then....I did what any reasonable person would do....I called Waldo and asked her if she would come to the rescue....


 Waldo to the rescue :)
 She suggested we hand sew/applique the pieces in place....WHY didn't I think of that?  Look  how nicely it came out.  I did ask her to do the first one...and then I did the second seam...I was feeling like a weenie.  See what the struggle for perfection can reduce an otherwise resourceful person to?  I'm sticking with "Good Enough" and to H E double hockey sticks with Perfection!!! (you may need to remind me of this from time to time...and I'll be kind and do the same for you :)

Now the "Perfection Thing" has passed (laughing under my breath) ...I went on to do some machine embroidery.  The embroidery machine I had been using was borrowed and I had to return it yesterday....soooooo...you know what that means....get it all done quick.

 This is a Floriani Design and all of these are using Floriani Threads.   Ain't she purdy?
Another purdy one :)

The next one....well......lets just say that the universe was checking to see how well I have learned my lesson about perfection.
The top thread must have got caught in the bobbin...or some such thing...and I had to remove the design from the machine.   When I put it back in....look what happened.  The red area on the hummingbirds chest....that is supposed to be up on the flower and the big blue dot on the birds head....that was supposed to be in the center of the flower.  I am pleased to report that I will applique some fabric over this baby and make it work.  Anyone says anything...ever....I'll just say that's how it was supposed to be!  Ahhhh...I'm feeling the freedom :)

I told you there would be a lot....what can I say....I have not posted to my blog in 4 days!!!

Look what I got in the mail on Monday:
 A travel holder for my curling iron....isn't it beautiful?
My girlfriend, Jean, had made one and posted about  it here.  She offered to make me one so of course I said...oh yeah baby! :)  Look how beautiful she embellished it.  The button and flower really takes this curling iron cover from a utilitarian item and transforms it into a zippy piece of traveling art.

If you are still reading....I'm almost shocked!!!

Last evening I had to run to my friend Diane's house for a favor.  She had a belated birthday gift for me.  I was so surprised.  Look what she has made for me:

A snap purse made from Marcia Derse fabrics.  I had goose bumps and lots of them too.
Now I have two "Derse Purse's"....I think we should start calling them Derse Pursey's ...no...sounds dumb doesn't it?  That happens sometimes.  

 But wait...there was more....can you believe this?
 The first one says, Rise and Whine and the second one says, Put on your big girl panties on and deal with it.  Too funny...I just love them.

Lots of presents....what a way to start the week ay?  I am one very lucky lady :)

As I was leaving Diane's house I saw this on the table....I couldn't help myself....had to take a pix of it to share with all of you:
Hope it leaves you giggling too.

Smiles,
Kelly

Wednesday, April 18, 2012

Bling Your Thing Entries Post III

I've received so many e-mails asking to see my "Bling Your Thing" challenge piece that I thought I'd post mine today and all the rest tomorrow.  You know I documented the process right?  That's what bloggers do :)

Entry # 9 - Kelly Jackson- that's me :)

I wanted to use something I already so I pulled out a gift I received from Nadine Ruggles during her Schoolhouse lecture at Quilt Market.  She had given the attendees a little packet of fabric, beads and instructions to make an Inchie. 

I enjoyed her presentation so much and I've always wanted to make an Inchie....but I have not taken the time to make one until I came up with the "Bling Your Thing" challenge.  Nadine's book, Inchie Quilts is the perfect way to start doing some embellishing if you have not given yourself permission to play previously.

This is the fabric Nadine supplied in the kit.
Beads that were included in the kit.
All I could think to do was to put the beads on the dots and then add some of the longer beads.  It was so boring and I knew it needed something else.  So I ran down and searched through my embellishments and found a package with these three little polymer turtles.  They are not beads and don't have holes to stitch through.
The minute I put the spotted turtle on the piece I knew it was the right thing to do.  So I got a sharp needle and poked the needle and thread through this little fella and stitched him in place.  While looking at the turtles the bright green one really appealed to me.  But when he was sitting on the piece something wasn't right.  That's when I got the idea to add some more bling.
I plugged in my Kandi Corp Professional Touch Crystal ApplicatorLucky for me I had a package of Green 3mm Eye Kandi (that's what Kandi Corp calls their Crystals) and I started to randomly add "bling."
I started with one crystal to see how it would look....I liked it so I just kept adding until it felt right to stop.
I used a piece of thin batting behind the base fabric that I embellished.  As you can see above, the embellishments held nicely and all my knots and excess beading thread was on the back.   On the right is a piece of Floriani Stitch N Shape Double Sided Fusible that I had fused to a piece of plain fabric.

I gently pressed the embellished top to the layer of Floriani Stitch N Shape.
Next I did a stay stitch around the entire design and trimmed away the excess so I could see where the stitching would fall when I did the final stitching.
I used Floriani Embroidery Thread because I love the sheen and this is what it looked like.  As much as I tried to ship those little white threads around the edges, I couldn't snip close enough. 
Fabrico Fabric Marker to the rescue!!!
Here is the finished piece.  I used the Fabrico Marker here and there to cover the white threads and give it a two tone appearance.  (you can always use fabric markers to cover things on your regular quilts too...fyi)

My little slice of "turtledom" measures 2" x 2 1/2" and is by far the smallest thing I've ever stitched.  I love how it turned out and have been thinking about what to do with it.  Perhaps I'll make one 1/2 the size and embroider my name on it, then attach them with little hoops and use it as a name tag for my Machine Embroidery Guild meetings.  Who knows?  However....I did manage to "Bling Some-Thing" and I was quite surprised by how much fun I had.

Serendipity Happens
I was preparing to publish this post when I was interrupted by the sound of the mail truck.  I hopped up and grabbed my packages and met Loren, my mail carrier.  To my great surprise there was a small box addressed to me.  It wasn't ticking so I opened it :)

Sue Spurlock who was the inspiration for the "Bling Your Thing" challenge had sent me this beautiful doll.  Her note reads, "Kelly, Your description of yourself inspired this." 
 
You may recall some of Sue's work is in the book, Creative Quilting with Beads.   The book review is HERE.

I had goose bumps...I'm in love with "Flies by Seat of Pants."  THANK YOU SUE!!!! I think you pegged me dead center! 

Gigantic Smiles,
Kelly

Thursday, March 8, 2012

Talk About Addictive

Addictive in a good way....naturally! :)  I know many of you are not into Machine Embroidery but that doesn't mean you can't appreciate the results...right?  Right :)

I had a wedding shower to go to last Saturday and I knew I was going to be giving a gift card because the couple live out of state and they'll be moving soon...a gift card is just the right size and weight for travel.  I still wanted to give them something fun to open at their shower.  Check these out.....

I used Floriani threads because I love the way the colors have a shine that just pops the design.  I didn't want hoop marks on the towels because I was them the same day so I used Floriani Perfect Stick stabilizer.   I just hooped the stabilizer and positioned the towel, pressed it down and I was good to go.


 Call me corney if you must...but I have always liked hand towels and kitchen towels that have a pretty design on them.  I think they are sort of decadent....clearly not required....but fun and frivolous to have.  Like kitchen / bathroom jewelry if you will.


What I'd like to know is how on earth anyone does Machine Embroidery without excellent tweezers and a pair of very fine pointed and sharp scissors?  I used my Famore Micro Fine Tweezers and my Dovo Embroidery Scissors to cut the fine threads from the back.  All the other tweezers I own would not pull just one or two threads....and I needed to do that here and there....so I'm thinking if anyone who doesn't have a pair of Famore Micro Fine Tweezers needs to get some lickity split....no kidding.  By the way, if you do order them from IHAN and decide you don't think they are the bomb I'm telling you they are....I'll refund your money along with paying the shipping too.   The tweezers were great to get that little bit of stabilizer off the back in the tiny spaces too.

This is another one I made for them....I loved the Eggplant design.  Naturally I made them others and in my race to the finish line I didn't take photos.  I literally finished the towels within a 1/2 hour of needing to leave to go to the shower.  Do you know anyone else like that?  :)

Switching topics here....I've gotten a lot of e-mails asking how the Flamingos are doing.  They are just fine and in the same place that I showed you last time.  When the folks who own them get around to moving them...I'll be sure to get another photo to update everyone.  I was thinking about sneaking over there and doing something funny with them to give the owners some pleasure and humor....but then I was afraid it might not be the best thing to do....I'd be trespassing....so I didn't.

While tutoring at my co-workers school last week, a little girl wanted to show me the book she had just written.  I asked to take a pix and she let me.....and since it isn't identifiable....I'm posting photos here to share with you a few moments of joy and humor that was written by a 9 year old little girl.
 

I hope you can read each page....

Smiles,
Kelly

Translate

Related Posts Plugin for WordPress, Blogger...