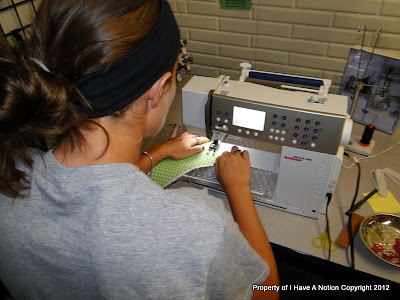
I'd like to introduce everyone to one of my dear friends, Karin. Karin has done machine embroidery for many years and is much more knowledgable than I am currently about the subject. She has agreed to be my Embroidery Consultant and write guest posts for IHAN blog readers. So without further ado....Karin...take it away :)
Hoop the unhoopable? Yup, it can be done! You just have to have the right tools to do the job, and Floriani has ‘em! The other day, I wanted to embroider along the edge of some pillowcases. But how was I gonna hoop them so they’d stay where I wanted them and the embroidery would still be aligned properly?
Not a problem -- Perfect Stick to the rescue!
I hooped my regular tear-away stabilizer, then I added a strip of Perfect Stick right down the middle. How come Perfect Stick doesn’t stick to my hoop? Because it’s got a layer of paper over the sticky part (which keeps it from accidentally collecting those loose threads, too!). Here I’ve scored it with a pin & I’m ready to remove the protective paper from my stitching area.
Because my design was so large, I had to rotate the design so that it stitched from the top of the hoop to the bottom of the hoop, and that made the design read from right to left when the pillowcase was removed from the hoop. Clear as mud, right? It’s lots easier to understand by looking at the picture:
That little blue dot is my center (left to right & top to bottom – a lot of people use lines & crosshairs, but I like to live dangerously and just wing it!), and the pillowcase is rolled up in the throat of the machine, to the right of the hoop. And the checkerboard? That’s the sun coming through the window & casting a shadow of my rubber shelving; sorry about that. But, you can see how my pillowcase isn’t really hooped, right? See the edge of it, about 2 inches from the hoop on the left? Couldn’t do *that* with just regular stabilizer…not without puckers, you couldn’t!
OK, now we’re ready to press Start & go get ourselves a cuppa. ROFL! I don’t know about YOU, but I *never* go get a cuppa! I’m the world’s biggest klutz, and I’m married to the world’s next biggest klutz (don’t believe me? ha – I have stories, and from 500 miles away, I can see Kelly nodding her head in agreement!) so I don’t bring drinks into my sewing room, and I really don’t ever leave the machine untended. Seems that every time I turn my back on him, I hear ca-chink, thunk, klunk, and brrrrrrrmp….and when I come back, I see the screen that tells me to check upper thread (it’s usually broken, just like the needle, at that point). So, I just sit & watch it work, or at least stay really, really close by. Besides, even after all this time, I am still fascinated by the fact that a machine is doing all the work & I get all the credit.
So, we’ve got our pillowcase hooped & sewn, what do we do now? Because Perfect Stick is tear-away, that’s what we do! We carefully remove the hoop from the machine, trim the jump stitches & begin tearing the stabilizer away from our project.
See how easily it comes off? If you’re really careful (and cheap, like me), you can patch those holes with another piece and re-use the larger one. I can get about 3 uses out of the bottom layer before it begins to lose its stick.
You may notice a layer of stabilizer fused to the pillowcase – that’s Floriani No-Show Fusible Mesh, just to give a little more stability to the pillowcase…I really don’t like puckers in my finished products. And speaking of puckers, I bet you’ve also noticed that rubber-shelving stuff I have on my hoops….that’s what I use to really secure the fabric in my hoops (when I bother to hoop the fabric!). That stuff is just like Super Glue, only better, because there’s no glue residue and it lets go easily when I want to remove the fabric.
If you don’t want to use a tear-away product to hoop your unhoopables, Floriani has a sticky wash-away product, as well. It’s called Wet n Gone Tacky, and it works pretty much the same way….just cut a piece big enough for your project, hoop it up (I won’t object if you whoop it up too!), remove the paper, stick your project to it & sew! Only difference is when you go to remove the project, you need to cut it off the stabilizer with scissors (not your good shears – use a pair from the Dollar Store!). You’ll be left with this:
Now, to be honest, I ran my pillowcase under some cold water, and let it dry in the sun. That didn’t take long; I believe it was about 105* that day! But, apparently, I didn’t get all the stabilizer washed out, because I was left with a hard & scratchy pillowcase edge. Not at all suitable for the little punkin-heads I was sewing for! So, I threw just threw all 6 pillowcases into the wash, dried ‘em, and then pressed them. After that, the No-Show Mesh was still in place (that stuff is wonderful!) and all the tear-away & wash-away was gone. I fused another layer of No-Show Mesh over the stitching to hold it all in place and give it a little nicer finish, gave them all another quick press, and I was done!
Not bad for a day’s work, if I do say so myself! Couldn’t have done it without Floriani’s Perfect Stick tho!
Want to see some more unhoopables? Check out the lunchboxes I got for my grandkids:
Cute, huh? Well that little flap is about the ONLY thing that lays flat, and all the rest of it is insulated, too, so if I had stitched there, I’d be putting holes in the insulation…not so smart.
Here’s how I hooped ‘em:
And here’s how they look now:
OK, I lied. That’s how they looked about an hour ago. Now they’re all boxed up and ready to ship out!! Perfect results, with Perfect Stick, every time!
Best Regards,
Karin
Thank you Karin!!! If you would like to contribute to the IHAN blog, just e-mail me at IHaveANotion@yahoo.com and we'll discuss it .
Smiles,
Kelly


