Announcement!

I Have A Notion blog and store have moved to:


the store can be found at


There is a much easier to navigate store, with new items. The blog has its own page as well... new content too.

The blog is now at www.ihaveanotion.com/blog

Please come and visit!

Monday, August 13, 2012

Bowling Anyone?

 It's a Bowling Party....well....sort of.....it's really more of a Hop than a Party :)

No balls necessary...although I did use pins.
(yes I mean bowling balls...you have a terrible mind I tell ya!)  


Bowls with Borders Blog Hop starts today and I'm telling you I've already seen so much variety and fun...what a joy to see what others have been making.

On August 17th you'll be able to see the Bowls I've been working on.  Here is just a little sneak peak for ya......
I'm not very good at surprises anyway....I'm the one who always wants to know.  If you have not already been Bowling today...just Click Here to begin your Bowling Trip.

For those of you who are hooked on the Flamingos...here is the latest update:

A Flamingo Olympic Soccer Game on Saturday.
Silly me...the last time I saw this I thought it was a parade....
It was not a parade....it was the opening ceremony for the Olympics and this was the closing ceremony.  Some of us are not quite a sharp as they'd like to be :)

Flamingos wearing hats....are these folks wonderful or what?

Hope this leaves you with a smile....if not....

Smiles,
Kelly

Sunday, August 12, 2012

IHAN® Trademark is Now Official

Has anyone noticed the IHAN®  banner has changed on the I Have A Notion  ® website.


Yes, IHAN ® is now a Registered Trademark :)
(for anyone wishing to have the exact numbers I am more than willing to send you a copy of the registration)


We are now in the process of having all of the buttons changed for those of you who have them on your websites (I shutter to think where I would be today without all of my friends...hugs to all of you...big hugs too :)


Nothing else has changed and for those with inquiring minds....I did not stamp the Elves foreheads with the ® symbol...LOL


Smiles,
Kelly


Thursday, August 9, 2012

Thats Why They Call It Patchwork :)

Before I get to the Patchwork part....I think many of you will want get some Olympic Updates.

I'm not sure if these are "Official Olympic Results" ...I'm just reporting what I saw!

Yesterday morning brought an awards ceremony. I stopped to congratulate the winners.  I'm guessing these are the Olympians from the weight lifting and gymnastics team ...from last report.

Fierce Flamingo Fencing

A mini-Dream Team

Flamingo Beach Volleyball....isn't this incredible?

I'm so grateful to the couple who put so much time, effort and money into giving us a smile each day.

QUILT RELATED :)

I just figured out why quilting is referred to as patchwork.  Some of us are not as sharp as others sometimes....LOL  I finished the UK quilt top yesterday and this is what it looks like:
It needs to be pressed etc....but it is finished and it doesn't look all that complicated does it?  A quilter would just draw out a scale and write down the dimensions, cut the fabric, sew the pieces together...right?   This quilter just so happened to draw up no less than 8 pattern options....then draw out the dimensions....I measured and measured and measured....cut.  Wrong....the blocks were not the same size.  After a few more attmepts...I call in the National Guard....Mr. McSteamy.  Yep....he had to do it twice too!  ROFL

Then I changed where I put the one border and it was therefore not long enough....so I did some PATCHWORK :)

How this happened is beyond me.  This was supposed to be a quick little project for my son-in-law as a sofa throw.  Now the border looks nothing like my plan....but hey....the top is finished and I'm guessing no one on earth will really give a hoot.  Now to baste it ....wish me luck.

By the way....I've decided I do have an expertise.  I'm going to give graduate level courses at the Quilt University.  The title of the class?  Un-Sewing....only for experts....are you going to take the class?  I'll need to know because there is a limited number of seats available.  ROFL

Smiles,
Kelly

Monday, August 6, 2012

Heat and Gone Topping by Floriani -Review and Blueberrys too!

Guest Post by Karin Callander for I Have A Notion


I was so excited when Kelly asked me to look at toppings for her – my first thought was HOT FUDGE!  Closely followed by CARAMEL!  Then BLUEBERRY DRIZZLE!  Then I realized she was talking about stabilizer toppings.  Not quite hot fudge, but still a topic close to my heart


The right stabilizer topping is every bit as important as the bottom stabilizer, and I’m about to show you why.  For years, I’ve used the name brand, water-soluble topping on the top side of my embroidery projects wherever there was a nap to my fabric, or the fabric was textured in any way.  This includes denim, terry cloth, and velour, even some of those home decorator fabrics you can get on sale and make terrific market totes!  And waffle-weave towels.  The topper stabilizer keeps the stitches from sinking into the pile or texture of the fabric, and it allows your embroidery design to pop. 

But, did you ever stop to think about that water-soluble topper?  What happens when it gets washed away, as it undoubtedly will?  Eventually, that topper is gonna disappear, and all your stitches will sink into that texture, as if you had never used the topper in the first place.  So, if that’s what you want, well go for it; you might as well not even waste your time and money on a topper in the first place.  But, I’m pretty sure that’s NOT your intended result.
Heat N Gone by Floriani eliminates that sinking feeling!!  And you know Kelly’s going to bring it to us at the best price possible!!  Heat N Gone.  Let me say that again – Heat N Gone.  Wonder why they call it that?  You’ll know once you use it!


Put a layer of Heat N Gone over your fabric (you can hoop it all together or just pin it in place, whichever is easiest for you), stitch your design, tear away the excess, then gently run your iron over it.  POOF!  Watch it disappear.  I’ve asked the people that know things, “where does it go?”  Well, they don’t know either – they just know it doesn’t gum up your iron, there’s no little pill-balls to remove, and it doesn’t leave a gunky residue on the project you just spent hours on.
Think you will get the same result from water-soluble?  Think again, my friend.
Here’s a sample I stitched out for you. 

The first design, (left) I didn’t use any topping at all.  Notice all the little nubbies poking through?  Yeah, not very pretty, is it?  The topper is used to prevent those nubbies.
The second design (bottom right), I stitched with a water soluble topping, and the third (top right), I stitched using Heat N Gone.  Then I started washing the towel.  I washed and washed and washed it.  I’m pretty sure it’s been washed about 15 times by now.
Now, I’ve got a high-efficiency washer, which means hot is HOT, and spin is something like 3800 (yes, HUNDRED) revolutions per minute.  And look at the difference in how that design is holding up. 
Here’s the one with no topping.  We still have nubbies, just lots more of ‘em:
Here’s the name-brand wash-away; notice the terry cloth is making its way through the design:
And, finally, we have Floriani’s Heat N Gone:
OK, now I have to admit – the stitches aren’t as tight as they originally were, on all 3 designs, and there’s a bit of separation, even on the Floriani design, but that’s not the fault of the topping.  That’s because I used a tear-away stabilizer on the bottom, and for the amount of abuse I’ve heaped on this towel, a cut-away would have been a better choice for a more permanent base.  But, checkout out those leaves – there’s not a nubbie in sight!
Get a roll and decide for yourself, if you don’t believe me (or my pictures!).  I think I’ll go find me some hot fudge!   If you’re one of those unfortunate folks who get migraines from chocolate, you have my sincere sympathies.  And here’s a blueberry drizzle recipe just for you, courtesy of www.cooks.com!  (and, yes, I abosolutely DO put this on all my cheesecakes!!)
BLUEBERRY SAUCE:
2 tbsp. sugar
2 tsp. cornstarch
1/4 c. water
1 c. blueberries
1 tbsp. lemon juice
In small saucepan, mix sugar, cornstarch, water, and lemon juice. Cook and stir until thickened. Add blueberries; cook until bubbly. Chill. Spread on top of cheesecake and refrigerate (if you can wait).  Personally, I slice my (still warm) cheesecake, plate it, then pour the sauce over the slice and enjoy it right away.


Written by Karin Callander for IHAN


Sunday, August 5, 2012

Local Olympic Heros....Sort Of....

Yes.....we saw an extraordinary performance from Phillipe Flamingo Dude-Guy on the balance beam....what a performance it was too! 

The next event was weight lifting....
Synchronized weight lifting ....a recently added Olympic Event!  LOL

Hope your Sunday is going well.

Smiles,
Kelly

Friday, August 3, 2012

The Reliable V-50 Iron Wow's Again! Anyone Surprised?

If it surprises you....it really shouldn't.....I've been saying this is the most incredible iron for quite some time....then Oprah caught on (I think she really needs to read my blog don't you?...Oh wait, maybe that is how she learned about the iron in the first place.  Quit laughing....ya just never know.)...and now we have another V-50 lover.....who will be next?  
 Nick, my nephew, has joined the IHAN clan.  He needed to iron a shirt and asked if he could use our iron.  (I know it is shocking that a 17 year old would care to iron a shirt and actually know how....it is true :)  I told him there is one set up in our bedroom and he could feel free to use it.  A few minutes later he came down wearing a nicely pressed shirt and said, "JoJo, that is the best iron I've ever used in my life, where did you get it?"  ....his exact words.

After Nick's response to the Reliable V-50 Iron I asked him if he'd be willing to let me use his words and pix for a blog post....and he agreed....good kid ay?

I have to say, I still get a kick out of people telling me how much they like their V-50 and all I can says is....I told ya so....and then I giggle.  I do like being right....I know that's arrogant...but sometimes...I just can't help but indulge in a little bit of my dark side.  Does that ever happen to you?

Not much is going on around here that is new....I'm waiting to see the Dr. about this "change of life" situation.  I'm telling you it has taken the Kelly right out of me.  You may have noticed I don't blog as much and there are fewer reviews....but until someone can help me resurrect the Kelly in me....then this will just have to do.

The Flamingos do keep me going....such a fun and entertaining part of my day.  Check out their latest activities:
The Flamingo Family has a new ring-leader :)  Guess what she had them all doing?
I just know she wasn't making them march in this heat....it must have been a Flamingo Parade :)


Last night Waldo and I went to our Applique Group and on the way I spotted this car....and for a moment I was transported back to Mayberry RFD.

I didn't slip into time travel at all....it was really sitting there....another reason to smile and be grateful for those simple joys in my every day.  While I'm waiting for the "Kelly resurrection" I might as well find some fun stuff to keep myself going.

Smiles,
Kelly

Wednesday, August 1, 2012

Beating the Heat and a Notions Wallet by Nobel Notions

It is hot here in Ohio and the Flamingos are beating the heat the best way they can.  These two are sitting on a bench near a tree trying to stay cool.

I caught these two lazy birds sipping Flamingo beverages....and when I saw that I giggled and then I wondered.  Would you see people drinking out of people embellished glasses?  Hmmmm.....

Apparently they finished those two quickly because on my way home this afternoon...this is what I saw:
I guess they needed something a little stronger this morning....LOL!

Here's what I've been working on:

A Notions Wallet by Nobel Notions:

 I received this pattern to review and I thought I'd give it a whirl.  This project calls for some fun stitching fabrics don't you think?

Loralie Fabric was just the ticket!

My Notions Wallet now hangs on my temporary sewing area in my livingroom.  I say temporary, because was only supposed to be there until I finished my UK quilt....and I've still not gotten back to it....oops!  An extended temporary :)

Smiles,
Kelly

Monday, July 30, 2012

More about the Candice Purse (Lazy Girl Designs)

This morning I transferred all my necessaries to my new purse and I discovered something I didn't realize until I used it.....keep reading :)


If you have not read my post from yesterday...click here...and you'll be caught up to speed.

Now everyone knows what I'm referring to :)  Yes, I made this purse using the Candice Purse Pattern and I was able to make the purse without frustrations because of the excellently written instructions and photos.  The pattern had no errors and it was written for those who like written instructions as well as those who prefer photos.

Today I left the house to take the boys to Legos Camp and that is when I became aware of a very important feature ....the angled front pocket.

No more fishing around for my keys.  I have made many purses and they've all had pockets...inside and out....but none of them made it so easy to find my keys.  I carry my purse on my left arm so I easily slide my right hand into the pocket and yep....keys without frustration.  The pocket is actually large enough to put my I-Phone in as well.  I made a pocket inside my purse for my I-Phone so I probably won't make a habit of putting it in the pocket....but I could :)

See how tidy the inside of my purse is....no huge mess....and lots of nice pockets.  The pattern provides choices for your pocket construction so you can put an e-reader or i-pad in your purse if you like.

You know I'm in love with this purse!!  I could even make an angled pocket on the back if I wanted to....oh just think of the possibilities :)  That is another thing I really like about the Lazy Girl Designs Patterns....Joan writes her patterns so you can use them as a jumping off point.  You can individualize your purse using your own creativity.  I can now use the purse pattern and change things around ....add a zipper (instructions included in the pattern), make pleated pockets, pre-quilt my fabric or add embellishments.  

I gave this pattern a 4 star rating and Joan asked me what the scale was for the rating.  Good question Joan.  Honestly, I had not really thought about it.....to me it was a top rating.  Since giving it some thought, I'm changing my rating to a 5 STAR and I'm going to be adding that system to the IHAN website.  That way I can put my ratings right next to products and you can later read more about how I came to that rating.  Thanks Joan for the inspiration!

5 STARS....why?  Clearly written instructions.   Excellent photos for visual learners.  No errors in the pattern.  Several options provided: pocket variations, zipper or no zipper options and rectangle ring options as well.  

Now I'm working on getting someone to make a graphic for me so I can add the 5 star rating system to my website....look for it soon.

Smiles,
Kelly

Sunday, July 29, 2012

Candice Purse Pattern Review and Reveal

I have had the Candice Purse Pattern by Joan Hawley of Lazy Girl Designs for quite some time and I've been meaning to make a purse for myself.  My problem was...every time I pulled out my fabric to cut it out,  I didn't like the fabric I had chosen or purchased for the project.  So...I just figured the timing wasn't right and I'd wait for the right fabric.  I don't want to carry a purse around that I don't love....that is no fun.

I wanted to use everything Joan uses for her patterns so I used the Nancy Zieman Rectangle Rings by Clover and I also used a Bag-E-Bottoms by Lazy Girl Designs.  The reason I had chosen a Lazy Girl Design is because I wanted to see if I could follow her pattern instructions.  Most of you know that I can't understand patterns and I get so frustrated that frequently all I can think of is either:
A: I want my money back or
B: Why didn't they ask me to test the darn thing first....I know I'll make every possible mistake and I could save them tons of wasted paper
(I don't have time to test everyone's patterns by the way)

Suffice to say....I give the Candice Purse Pattern  4 stars for clarity of  written instructions and photos to help guide visual learners in being successful with a pattern.

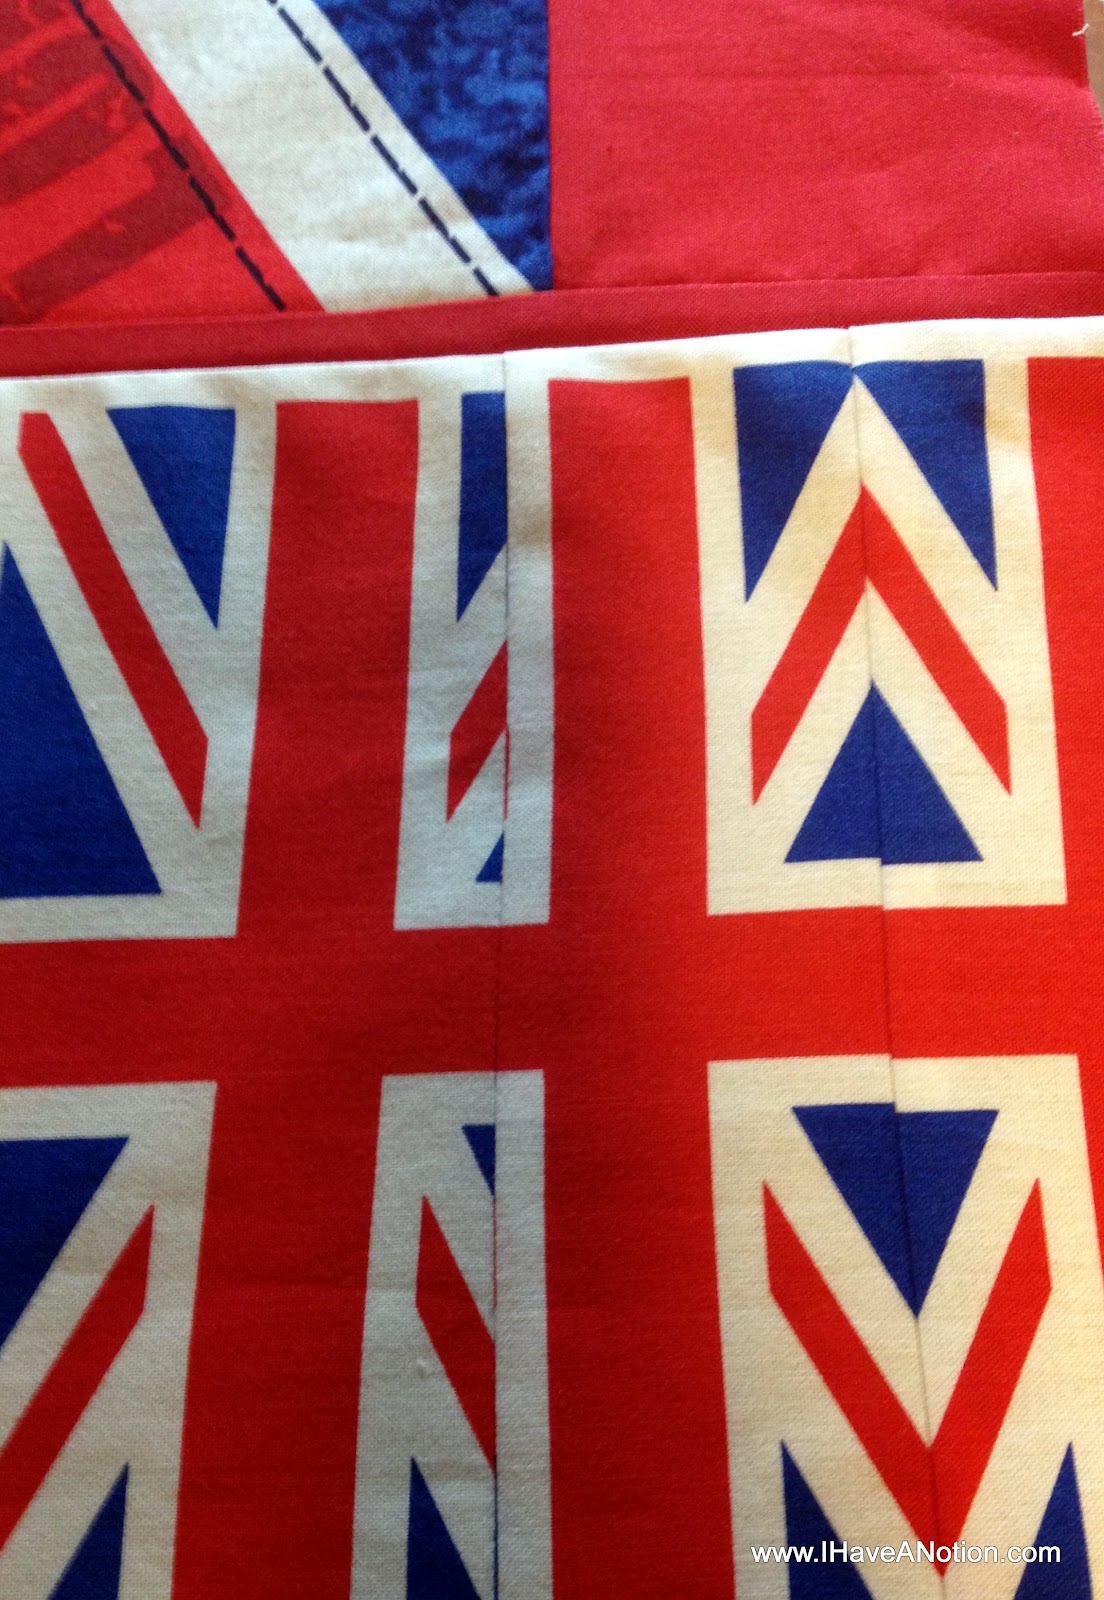
Selecting fabric was a bit of a challenge for me.  I had purchased some Kaffe Fasset fabric that I loved but every time I got it out to make this purse I ended up putting it away.  It just didn't "feel" like a Kelly purse....know what I mean?

Then it hit me....the fabric that was left over from the Marketplace India Quilt that I made.  You can read about that by clicking HERE.  I was able to keep the left over fabrics and there wasn't a lot left that I could choose from so I had to be very careful....there would be no going to get more fabric later if I made a mistake.

Lazy Girl Design patterns are really more of an instruction booklet with step by step directions and photos to coordinate.  I labeled each piece of fabric so it would coordinate with the instructions.


I was not comfortable photographing full pages of Joan's patterns so I used just this one to show you how clear the instructions are organized. I was able to follow along to achieve great results.

(I used Wonder Clips by Clover throughout this project and they were really wonderful :)


Before I go any further, I think it is really important to tell you that if you were to follow the exact  directions in the Candice Purse Pattern you would be successful in completing a lovely purse.  That is not to say that I followed the directions exactly.  Surprise anyone?  Probably not ay?   And I had  success with one deviation and the other deviation was a disaster.

The successful deviation?  The pattern recommends using fusible interfacing and batting in the purse handles.  I choose to use RocLon Multi-Purpose Cloth because I like the way it wears.  I used the Multi-Purpose Cloth in my camera strap and I wanted to achieve the same wearable results.  That is not to say my variation is better....it is only to say I wanted to achieve similar results as a previous project.
The Multi-purpose Cloth is easy to stitch through and I just cut a 1" strip the same length and width  as the finished strap.

No where in the pattern did it say to label your fabrics...I just decided I might be more successful so I didn't get confused.  Most people would remember to remove the label before ironing on their fusible batting...not me....I had to go back and remove it afterwards.....sheepish smiles.

I was careful to lay out all my pattern pieces just like the photos in the Candice Purse Pattern.  Here you can see that I noticed another "small" error I had made.  The first step in the pattern is to make the back of the bag.  The directions are very clear and well written.  That didn't stop me from goofing up....I'm sorry to say.  What I didn't notice was that I cut the small squares from the side of the back of the bag instead of the bottom....oops!

Now, remember I didn't have lots of fabric so I had a decision to make.  I decided to cut off that section and add another piece of fabric there.

Well....here is yet another example of operator error.  I still can't believe I did this.  By now you may be wondering why on earth I would be telling everyone about all the mistakes I made....right?  I'm sharing my mistakes because I want to make it clear these were "MY" errors....not the errors in the pattern.  I have frequently found that the pattern has the errors and no matter how I execute the instructions....the pattern doesn't make sense.  Everything in the Candice Pattern made perfect sense and was very clear.  The other reason I'm sharing my mistakes is let others know they aren't alone in silly mistakes...we all do it....even my friends who have 50 plus years of sewing experience :)  


TA DAH!!!!  Even with all my own mis-steps...I still ended up with a beautiful new Candice Purse and I absolutely love it.  Without the suggestion to use Nancy Zieman's Rectangle Rings and the Bag-E-Bottoms (bottom of purse support) I don't think I would have even thought to use them.  Thanks Joan for the suggestion because I think the Rectangle Rings are a lovely addition to my purse and the Bag-E-Bottom template has provided a sturdy bottom that gives my purse a professional finish. 

You may be interested to know that Joan Hawley has a blog and you can find it HERE.  She also provides free tutorials and those can be found HERE.  Like video demos as much as I do?  Joan also provides those and you can find them HERE.

I give this pattern 4 stars.....it was a breath of fresh air to have excellent photos to illuminate the very well  written instructions.  Excellent job Joan! 

Smiles,
Kelly


Translate

Related Posts Plugin for WordPress, Blogger...