Announcement!

I Have A Notion blog and store have moved to:


the store can be found at


There is a much easier to navigate store, with new items. The blog has its own page as well... new content too.

The blog is now at www.ihaveanotion.com/blog

Please come and visit!

Thursday, March 29, 2012

What's New at IHAN and Lots More

There was a reader who requested photos of the orange halo....and you know I take photos of almost everything...LOL.

This photo doesn't really do the "Orange Halo" justice....honestly....it was glowing orange!  ROFL still.

A bit of a co-worker up-date:

We have a proud artist on our hands here.  Check out the castle he made at school....
And the frog he made with clay.
You have to look closely....see what is in the Frogs mouth?  Other than his tongue?  I laughed out loud and asked Aaron why the Frog ate his baby and Aaron said with exasperation, "Mom, that is a fly!"
 PEEK!  Look closely....here I am...under the cushions.

Before the co-workers came along, we lived in South Carolina.  We had the pleasure of buying new furniture for our home and we choose a sofa that is almost 8 feet long.  I had a fit if the girls ate on the sofa and every day I flipped the cushions so they would last.  9 years later....the co-workers use them as their personal crash pad and I've given up trying to keep them clean all the time.  If only I could have let the girls take their turn with jumping all over them....Live and Learn!

On to IHAN News:

Did you see that IHAN has a new Category?  WHATS NEW AT IHAN
It is right at the bottom of the Catalog on the right hand side of the page...I've got it marked HERE in the photo above.  Just in case you are wondering what is NEW at IHAN...you can always just click on that link and see.   

Also New at IHAN:


There is also a new sub-heading in the Sizzix Fabric Cutters Category.  There is a new link for all dies that are compatible with the Vagabond and Big Shot  Fabric Cutting Machines.  Click HERE if you own one of those wonderful Fabric Cutting Machines :)
 
Now on to packing for the big Fishing Trip...which I hope you all know I'm not really going Fishing...that's my way of saying I'm out of the office :)
 
Smiles,
Kelly


Wednesday, March 28, 2012

Machine Embroidery Improvements

Oh but wait...first a Flamingo Update:

I'm not sure if this is Mommy or Daddy taking the new offspring out for a stroll....can you believe it? 

Ok, now on the the stitching :)  A few weeks ago I had made some kitchen towels for a wedding shower.  Much to my dismay I used a stabilizer that was not so easy to get out of this particular design.  Before I go on, I want to say that folks will tell you that learning what stabilizer to use is not an easy thing....and that is only a little bit true.   As a newbie to Machine Embroidery I can tell you that if there has been a mistake to be made, I've made it....and I wish I were kidding (not to say there are not more to make :).  Floriani offers a Stabilizer Workbook that you can download for free and print if you like.  You can find it HERE.  Between a little bit of experience and the Floriani Workbook you will find choosing the right stabilizer to be a whole lot easier :)

On this one I used Floriani Perfect Stick and I was very happy with the hooping process....all I had to do was line up my design and press the towel down.  Easy right?  Right!  The thing I didn't take into consideration was the density of the stitching  and how to get out those small bits of stabilizer. 
Honestly...no biggie in the whole scheme of things because it will come out in the wash.  However, most folks don't want to have to do that...and naturally the experts at Floriani know what they are doing!

This time I used Floriani Wet N Gone Tacky. 

The cool thing about Floriani Wet N Gone Tacky is it is also a sticky back stabilizer but it dissolves in water and there is not tiny pieces of paper to tear away.  Inside the package there are instructions for anyone who has not used this stabilizer before.  I hooped the stabilizer and scored the top with a pin and tore off the paper, revealing the sticky back stabilizer.  The shiny stuff you are seeing above is there because of the adhesive on the stabilizer.

As you can see, I hooped it with the paper on and then scored the paper exposing the adhesive.  I wanted the paper part to stay where the hoop was so it would not stick to the hoop.  Keep in mind, I am a newbie so if you know more than I do....feel free to share :)

The machine is just a stitchin' away....and I could not be happier that it isn't asking me what to do next :)

By the way, I'm using the towels by Dunroven House.  I've added a ton of them to the IHAN website and you can find them HERE.  I have been very happy with the quality and consistency of the Dunroven House Linens so I have purchased several different colors and have a nice little stash for making those fun kitchen towels.

Back to the stabilizer....
After the machine finished with the Salt towel I cut around the design and left the rest of the stabilizer in the hoop.  As you can see, I patched the stabilizer (which conserves stabilizer) for the next towel.
This photo may be a bit difficult to make out.  The blue is a kitchen bowl I used.  I filled it with water and just put the part of the towel with the stabilizer on it into the warm water and soaked it.  The white hazy looking stuff is the stabilizer melting away.  When it is dissolving it has the consistency of light egg white...a little goopy.  After a few more minutes I took the towel out of the water and took paper towel and wiped off the back of the design.  I could have soaked the entire towel but I was on a time line....as usual.....and I wanted the design to dry so my sister could take the the gift to deliver.

Here is the towel drying....look...no little pieces of stabilizer to be annoyed with....yeah!!!!


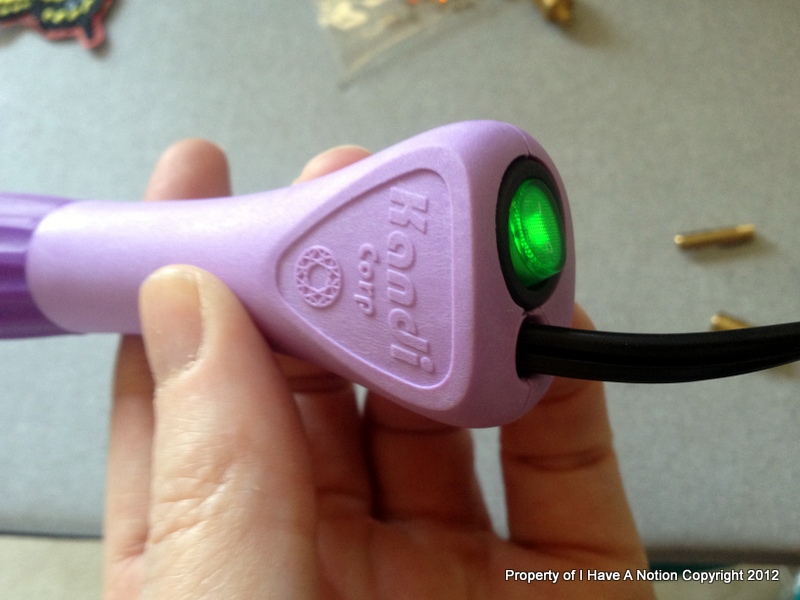
Speaking of annoyed....I find myself annoyed with the bobbins running out when I'm doing Machine Embroidery.  Truth be told, I don't want to stop having fun to do these "necessary" things ( I also don't like to stop and go potty....I just want to have fun...I'm a real child aren't I?). 

YEP....I did it....I got a Portable Side Winder.   If you think like I used to think....you are probably wondering why do you need a Side Winder when the Machine's have bobbin winders on them... right?
Because I spend my time winding bobbins while the Embroidery Machine is doing it's thing and I don't want to take the risk of messing up the machine by using it's winder.  I have pre-wound tons of bobbins so they are at the ready when I need them.  Is is a bit extravagant?  Probably....but I have to say the Portable Side Winder works well...works with batteries or electric and it winds a spanky bobbin :)

Above you might be able to see I was winding from a large cone.  The Portable Side Winder has a pin for regular size spools and not the larger cones.  There is a Deluxe Sidewinder as well....but I wanted the compact Portable Side Winder so I put the cone on my thread rack and fed it into the Side Winder.  It worked wonderfully :) 

The black thread in this photo probably shows up better.  I was pretty happy to have a bobbin at the ready so I could keep on keepin' on.

That's what I've been up too....other than a really bad hair accident...:)  Yep....my sister and I were coloring our hair over the weekend and mine turned out bright orange ...but only around my face and at the roots.

Yep....it was more like the dark orange around the outer part of this photo.  To get such "rare beauty" only cost me 8 bucks.  Correcting  it cost me 105 bucks.....ouch!  That is the first time that has ever happened to me and I have to say it brought a lot of laughter....and laughter never hurt anyone...it was good for the soul.

I"m goin' fishing again....Tomorrow, Thursday, is the last day I'll be shipping IHAN orders until Monday April 9th.  Since I'm not supplying organs for transplant....what is waiting 10 days for your notions right?  I have not decided weather or not I'll take my laptop to do some blogging or not....we'll see.  The boss told me to do what ever my heart desired....I just love my boss :)

Smiles,
Kelly

Tuesday, March 27, 2012

Winner of Bed Runners and More

Happy Tuesday Everyone!  I've been doing paperwork for IHAN so I didn't get to posting yesterday.  I know you all understand because  one gal can only do what one gal can do, right?  Right! :)

Bed Runners and More

The winner was drawn on Sunday night and the winner WAS:

SewCalGal's number came up in the first drawing.  To make along story a short one....SewCalGal  has opted to share the book with another IHAN Blog reader..  I wasn't surprised because she has such a generous and kind spirit.

 Back to the Random Number Generator and the Newest Winner IS:

Congratulations Caryl!!  Please e-mail me with your full name and address so I can get Bed Runners and More into the mail.

A reminder:

All  IHAN blog readers save $5.00 on   Another Bite of Schnibbles  until March 31, 2012.

Smiles,
Kelly

Friday, March 23, 2012

Another Bite Of Schnibbles & Bed Runners and More - Book Reviews

I have so many book reviews backed up that I thought I'd do two today...so it's a two'fer Friday :)  Keep in mind,  I get to choose the books I want to review so I'm going to be bias in my reviews.

Martingale and Company have provided me with the opportunity to review Another Bite of Schnibbles.  The author, Carrie Nelson, has a huge following and I know many quilters who love her Schnibbles patterns.

 Another Bite Of Schnibbles by Carrie Nelson  (LaVie En Rosie , Carries wonderful blog)

 Twenty four quilts from 5" and 10" squares...all in one book!!!

Carrie begins with some great information about handling pre-cut fabrics and some excellent directions for piecing.   I know from experience, if you don't handle and sew pre-cuts properly, you will end up with blocks that are not square at all.  Carrie shares all her tips and tricks in the beginning of the book so everyone will end up with consistent block.  Well...most of us...LOL.  Ya all know I can look away and end up with a wobbly 1/4-3/8" seam....that's why I have a excellent seam ripper :)

"Lincoln" uses 10" squares and I have a few layer cakes looking for an excellent pattern.  I love how fresh and fun this pattern is....don't you?

It was so hard to choose which photos I wanted to share because I really like all the quilts in Another Bite of Schnibbles.  The quilt above, "Reveille, looks like it might be difficult to make...but when you see Carrie's instructions you will be surprised by how" un-diffiuclt" it is to make.  

Twenty-Four patterns for just  $26.99 (only $21.99 for IHAN Blog readers through March, 30, 2012)  that is a steal!  Twenty-Four patterns at, lets say $8 each, would be $192.  Each pattern is only $1.10 for IHAN Blog readers...now we're talking a super deal! :)
  

Clotilde provided me the opportunity to review the next book, Bed Runners & More

Bed Runners & More includes patterns and instructions for nine bed runners( four include instructions for pillow shams) each by a different designer.  The bed runner on the cover, Geometric Jazz" by Carol Zentgraf,  got my attention because I thought it would be perfect for my co-workers.

There are times I'm in the mood to make something small and bed runners add some splash to a bedroom without the investment of so much time.  Oh, and did I mention that I don't feel so bad when the kids spill or get pen marks on a bed runner....I flip when the do that on a full size bed quilt.

"Warm Splendor" by Phyllis Dobbs is another bed runner that left me drooling.  I love the fall colors Phyllis used in this design.  By the time I could make myself a full bed quilt, I could almost have a bed runner for every season! 

"Summer Blossoms" is another of Phyllis' designs.  What girl would not love to walk into her room and see this fun bed runner?  The possibilities are endless. 

Each bed runner in Bed Runners & More are labeled by skill level, Beginner, Confident Beginner, Intermediate and Advanced.  

The instructions for each design includes diagrams like the one pictured above. 

A bed runner is an excellent way to dress up a room without the time investment of a full bed quilt.  Honestly, think they would look great across the back of a sofa as well....just a thought :)

There is a nice variety of designs in  Bed Runners & More , something for everyone!  I think I"ll give a copy of this great book away to an IHAN blog reader.    To win, all you have to do is leave a comment on this post and I'll choose a winner this Sunday evening.  How does that sound?  Fun I hope :)

Have a wonderful weekend!

Smiles,
Kelly

Wednesday, March 21, 2012

New Fun Stuff

Wow, I got a lot of feedback from yesterdays post.  Before I move on today, I want to say that I'm not upset with anyone and I don't have any negative feelings about Pinterest.  I just want to be sure before I have another account that I learn what it all means so I'm not doing anything I should not be doing.  I'm all about having fun!

Speaking of fun....did you know Floriani has introduced 60 brand new colors of embroidery thread? 


They arrived yesterday and I'm telling you I was drooling.  I put them on my front porch in the natural sunlight in hopes the colors would show up well.  Here is another photo:

Some how they just look more exciting on my front porch :)  So if you are looking for some new color....hop over and check them out..  You will also receive 10 Free Spring Jacket Back Designs from Floriani.....no shipping charged on the free designs :)  With the free designs you will be saving a total of $279.99!!
Spring?  Really?  I'm sorry but it is over 80 degrees here in Ohio today and it feels more like mid-Summer to me!!  Just look at the bush in my front yard:
People, this is March....not June or July....it is so odd to me to have it this warm so soon.  Do you think people will begin scheduling their Spring Break Vacations in Ohio?  Can you even imagine?  LOL

I've added a WHATS NEW at IHAN Category over on the website.  You can see what has been added recently.  There are so many things that are added weekly that I can't even keep up.

Hot Sweaty Smiles,
Kelly

Tuesday, March 20, 2012

Pinterest- Now we can't say we didn't know

I posted previously, HERE,  about Pinterest and was not fully informed.  I'm not saying I"m completely informed but I'm informed enough that I have removed my Pinterest account, boards and pins.

Did you know you can check to see if people have taken photos without our permission?  I learned from Making A Mark blog that you can check by typing in www.http://pinterest.com/source/    and follow that sequence with the title of your blog.  Here is an example that I typed in: http://pinterest.com/source/ihaveanotion.blogspot.com


 Don't Pin My Photos, Product Reviews 
or Tutorials

If by chance you have pinned any of my photos, I am respectfully requesting that your remove them from your boards.  I don't recall giving anyone permission to post photos from my blog to Pinterest yet there are tons of them floating around out there.

You can read more from Making A Mark Blog and here is the link to the copyright information on that blog HERE.


I know I pinned photos that I copied from other websites....not other people's blogs.  I did it innocently and I'm guessing others have done the same thing.  I learned that Pinterest then owns the rights to those photos.  Oh NO WAY!!! I learned so much from the Marking A Mark blog that I never thought of before....it is definitely a must read if you are a blogger.

If you want to make your blog or website Un-Pinnable...I highly recommend you read the Making A Mark blog posts.

Still Smiling,
Kelly

Monday, March 19, 2012

Happy Monday To You!

Happy Monday to you!  It is a Happy Monday for me because I'm heading over to the Quilt Foundry to do some stitchin' and I can't wait :)  My Birthday present to me.  Thank you to everyone who remembered that yesterday was my big ole birthday....48 never looked so...well....lets just not discuss it...LOL.

 On the "Flamingo Front" the babies seem to be doing just fine.  You'll see them in the far left of this photo...still in their nests.  The other siblings had a game of pick up basketball over the weekend.

Ya all know who this is, right?
 Yes...it is Ami Simms!  She was at the Toledo Gathering of Quilters, last week on Thursday.  I have not had the pleasure of hearing her speak before and everyone I know says, "don't miss her."  So off Waldo and I went to the meeting.  Ami is everything people say she is....genuine, warm, funny, kind and colorful.  I loved here jacket.  It is her pattern, Rag Fur Jacket.  She said the one she is wearing in this photo is 6 or 7 years old....and look how good it looks.

Ami's program was, "How NOT to make a prize winning quilt."  I can vouch for her....she definitely knows how to do that well.  So much of what she said resonated with me and my start with quilting.  I also made a baby quilt and every single corner is mitered differently.  I had no clue....but I sure was proud when I was finished.  Oh the freedom we allow ourselves when we just "do it."  I'll tell all of you what I was told, "if you get a chance to hear Ami speak....don't miss it."

Ami is the founder of the Alzheimer's Art Quilt Initiative.  Did you know that you can make a quilt that is 9" x 12" OR Smaller....but absolutely not bigger....and donate it to the Alzheimer's Art Quilt Initiative and they will sell it to raise funds for research?  Sooooo....while you are practicing a new skill, making a teeny tiny quilt that is embellished with beads, or you've never made a small quilt...you may just want to head over here and read all about it. 


Remember last week when I was busy embellishing everything?  I decided to embellish a few straight pins....for no other reason that because I could.

 I cracked up when I saw these femo heads on the end of my straight pins.  It gives new meaning to quilting with your friends :)  I thought the thread spool was cute too.  I stopped at three...I didn't want to get too carried away you know.


My co-workers were invited to a birthday party on Saturday.  The little girl who's party they went to just so happens to be a little girl that I  adore.  The boys gave her their gifts and I wanted to give her something special....so this is what I made for her:
I used Sarah Vedeler's Hearts Machine Embroidery Design.   I really like all the choices I have on that CD.  I think the birthday girl is such a Star, so I chose the heart with the star in the center.


Tajiana's favorite color is green so I made sure that the fabric was green and I used 7 or 8 different shades of Floriani thread for the design.  Her name had to be hot pink....after all...she just turned 9.
After I did the machine embroidery, I added some bling with my new Professional  Touch Crystal Applicator.    I think the crystals added a little zip and besides....I had to have an excuse to use it again right?  I inserted the design into a Quick Stitch Desktop Organizer.  Tajiana can either use it for pencils and pens or she can keep it in her bathroom for her tooth brush and tooth paste....or where ever she wants.  When she opened the package...she had a big beautiful smile on her face....that's all I needed.

Hope you had a wonderful weekend as well.  Happy belated National Quilting Day and St. Patrick's Day too....I was just too busy to blog...I know you understand.

Smiles,
Kelly


Friday, March 16, 2012

Increase Your E-Notion I-Q and the Teeny Tiny Challenge

Bling Your Thing Part II

Ok, back to our regularly scheduled programing :)

A long time ago I bought a tool at a craft store to set some hot fix crystals.  The thing didn't work worth a nickle so I took it back.  I was leery of them since....but then I decided to give the Kandi Corp Professional Touch Crystal Applicator a try. 


The Professional Touch Crystal Applicator comes with 8 tips (2mm, 3mm, 4mm, 5mm, 6mm, 7mm and two flat head tips).  They are labeled....but you'll need your glasses to see the markings.

The on off switch is on the end.  When it's on...the switch is green.  You may not think that is such a big deal until you see other hand held tools like this....they don't all have the lighted indicator...and I find it very helpful...especially since these things get so dog gone hot!  It needs to heat up for about 2 minutes before it is ready to be used.

I got really close so you can see the imprint of the size marking.

When the Professional Touch Crystal Applicator is turned off and cool....you screw in the tip of the size crystal you want to set.  Then you turn it on and let it heat up for about 2 minutes.

The first crystal I set was  size 3mm.  
The crystal is face up and the Applicator is pressed on top of the crystal....it sort of grabs it and holds it.  Very easy to do...just push and it is on there.

You can see here...the crystal is inside the tip.

 You can see the adhesive on the crystal melting...it sort of shines....that's when you know it is ready to be set.
Here you can see I just pushed it onto the spot I wanted it to be fixed...and then I lift up and wah lah....the crystal stays! It was that easy.  I have to say I was very impressed with the Professional Touch Crystal Applicator.

The Applicator balances nicely on the table and doesn't require a stand.  Typically I would be concerned about either burning myself or something being burned....but it was very stable...didn't roll or tilt once placed on the table. 
I like the variety packs of crystals Kandi Corp offers too.  These packages come with apx. 383 total crystals in size 3mm and 4mm. 

This is how I used to have to do my crystals.....yep...on the bottom of an iron with tweezers. It was always a trick getting the crystal turned over with the tweezers and getting it placed properly.  Not any more!!!

I bet you are wondering why I included this review with the details of the Creative Quilting with Beads Teeny Tiny Challenge aren't you?  I did it because I know many folks said that beading was too hard on their eyes.  You don't have to see the hole or get the needle through the hole if you want to embellish using a Professional Touch Crystal Applicator.

Sew...here are the details of the challenge. 

Everyone who agreed to participate...and anyone who wants to join us is welcome too....can embellish a quilted item with beads or crystals and send a photo of your project to me at IHaveANotion@yahoo.com on or before April 15th.  There is no size requirement...so if you want to make an Inchie.  You don't know what an Inchie is?  Click here.   Any size at all...and there is no judging...so do what ever makes you smile.  If it's ok to post a photo of your project on a follow up IHAN blog post let me know that in your e-mail.  I'm putting together a little fun gift package and everyone who participates will get their name in the hat.  Sound easy?  I thought so too. 

Smiles,
Kelly

Translate

Related Posts Plugin for WordPress, Blogger...