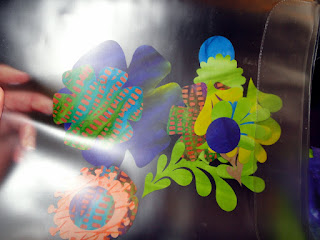
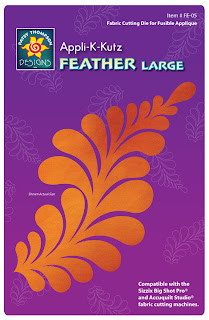
I wanted to play with some of
Patsy Thompson's Feather Dies so I searched some dyed fabrics in my stash. Once I found a fun color combination I got out my
Mistyfuse and fused it to the back of my fabric. I prefer
Mistyfuse because it is so lightweight that I don't feel it behind the fabric. I've used even the lightest of the other brand fusibiles....still stiffer than
Mistyfuse....that is why I like it (in case you were wondering :).
This is a pix of
Mistyfused laid over the fabric before I pressed it. Since
Mistyfuse doesn't use paper people often ask how I get it fused to my fabric.
Then I take it over to where I'm cutting out my appliques.
So many people say using Dies wastes fabric. Not for me. As you can see her I cut out a paper
Small Feathers and I laid it over the fabric to pre-view where I thought I might like it on the dyed fabric. I also could have used the negative space of my paper feather but I chose the positive
Then I cut out the fabric and lay it over the die and put my recycled paper over it and put it through my
Sizzix Big Shot.
It was that easy....I just took the applique over to my design area and started to play. This is when the real trouble started....Way too much fun and too many choices. I could have played with this for days.
I wanted a very large flower so I used the
Sizzix Flower Album Die. This die was clearly made for small albums....but I wanted it for an applique die. So, I hammered down the area of metal where the small circle was so I would not cut a little hole in my fabric.
Important Note: This die was made for making photo albums. I bought it and hammered down the metal in the small circle so I could use it for applique in quilting. Once this is done, the warranty is VOID. Just thought you should know :)That is how I got the larger flower below. I started playing with all the options to find a color combination I liked....this is what the process was like....first I changed the orange background fabric to black.
ONE
Then I started playing with options for the flower colors and shapes.
TWO
THREE
FOUR
FIV E
SIX
SEVEN
After awhile they all started to look the same so I separated out all of the flowers I made and went to bed.
Today I walked over and started playing again....I think I like this combination the best....what do you think? The first one or the second one with the yellow circle center? Do you like these combinations better than the ones above? I've not exactly decided on the placement of the feathers....weather to have them connect to the flower or not....that will probably be tomorrow.
EIGHT
NINE
I wanted a flower larger than the
Flower Album Die so I took the dark purple flower I had cut from the
Flower Album Die and took it to my printer. Thankfully I now have a printer that will reduce and enlarge (thanks to MJ:). I enlarged the flower by 110% then loaded a piece of
PrintNFuse into my printer.
I copied that flower onto the
PrintNFuse and fused it to the orange fabric and cut it out. Now I have an exact copy of that flower but larger. I'm one of those folks who can't stand being frustrated and I want it to come out nice so I have learned a variety of ways to change the size of various shapes.
I store my un-used appliques in an acid free envelope that I borrowed from my Scrapbooking Supplies.
Another question I get asked often is how do I store my dies. You already know I'm a visual person so it does not exist if I don't see it. I tape the paper inserts from the packaging to my dies and then I put them into my
Sizzix Storage Boxes. I like these boxes because they stack nicely and it helps my work space tidy.
There are trays in the bottom of the heavy boxes ....hopefully you can see in this photo....
and I just store them like that....no rocket science here. If you are still reading, I'm curious to hear if you like the flower with the feathers and if so, which one is your favorite.
Smiles,
Kelly


