Announcement!

I Have A Notion blog and store have moved to:


the store can be found at


There is a much easier to navigate store, with new items. The blog has its own page as well... new content too.

The blog is now at www.ihaveanotion.com/blog

Please come and visit!

Saturday, September 29, 2012

Christmas is coming - Floriani Metallic Thread Review

GUEST POST BY KARIN
(by the way....Karin is a friend who does not get paid anything at all to write these posts...and began using Floriani after I became a dealer....she was curious how it compared to the supplies she had been using for years.)

Christmas is coming!  Christmas is coming!!  Well, OK, it comes every year at the same time, ( 86 days away as of today), but in just under two weeks, the zoo we volunteer at is holding their silent auction to raise funds, and I promised I’d have something for them to auction.  Sooooo…I thought maybe a couple of Christmas-themed towels and a fabric basket would bring a couple bucks.  I thought it would also present a good opportunity to try out some Floriani Metallic Threads and let you know show you how well they work!

I chose a couple of cream-colored terry cloth towels I had on hand (I deliberately shied away from white, because I didn’t know if I was going to do a Santa or snowman or what, and white thread just doesn’t show up well on white terry cloth.  Next, I looked at all my Christmas-y designs for one that had solid fill lines & shapes, rather than running stitches alone, as running stitches tend to get lost in terry cloth.  So, I easily eliminated all my swirly winds and snowflakes & the delicate filigree ornaments in favor of the chunkier Santas and reindeer.  But I really wanted to incorporate a bit of sparkle from Floriani’s Metallic Thread, so I finally chose this little guy from Embroidery Library. 

But I wanted my towels to coordinate with the fabric basket I’d already made, so I chose to use these colors for my sewout:


Can’t really see that Floriani shine, can you?  Let’s try another view:


Ahhh, yes, there’s that shine!  And that’s exactly what I wanted to feature on my towels.  Oh yes, towels, as in TWO towels….how, exactly do you hoop towels so that the designs are in the same place on both towels??   I use a couple of rulers and that works well for me.


I just lay my towels side by side, put a ruler across them both, as evenly as I can, with the top edge where I want the center of my design, then make a small dot in the horizontal center of each towel using a water-soluble pen.  (If the design stitches over it, great – if not, it’s easily removed by dabbing it with a wet paper towel.)

So now I’ve got my centers marked, I just hoop ‘em up!  Of course, I used Floriani Heat N Gone as a topper so my designs don’t get lost in the terry cloth (see the difference in toppers here!).

Once I got into the design, I realized that maybe less is more.  I’m sure you’re wondering “what the heck does she mean?” OK, you’ve read this far, so I’ll tell ya!   I used brown for Rudolph and Floriani Metallic Red for his nose, and Metallic Gold for the first two flourishes.  Now it was time to sew the last of the flourishes, and I’d planned on using Metallic Green, but I was afraid so much Metallic would be just a bit too much, even for the blingy-lovin’ ladies of Texas….sooooo, what to do, what to do?  Well, Kelly had just the answer!  (and who of us was surprised by that?  yeah, me neither.)

Floriani’s Winter Collection had exactly the right shade of green – it was identical to the metallic green I’d originally pulled:

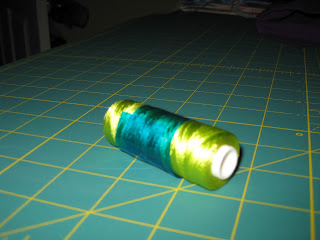
Bet you can’t tell which is which, can you?  (The one on the left is the normal polyester spool, while the one on the right is the metallic spool.) 
And you know what else is really cool about Floriani Thread Collections?  Aside from the thread quality, that is….each collection includes FREE Floriani designs on a CD you can use and reuse as many times as you need.  These are the FREE designs included with this Winter’s Collection:
So, how did  Floriani’s Metallic Thread perform?  Well, usually I have to sloooooow down the machine’s stitching speed, and I often switch out to a needle with a larger eye….but not this time!!!  I used my regular 75/11 embroidery needle and 850 stitches per minute, and not once did I have a thread knot or break.  And just look at that coverage, will ya?
That is some serious shine!  Santa will have no trouble following THIS Rudolph on the foggiest of foggy Christmas Eves!  And did the designs stitch in the same place on both towels?  See for yourself!


They did, they really did (the camera’s at a slight angle to minimize the flash, so the one on the right appears just a tad higher, but it’s really not!).
Am I pleased with Floriani’s Metallic Thread?  I am, I really am!  Will I use it again?  You betcha!! 

Now, who’ll give me a dollar, do I hear a dollar?  HaHaHa!  HoHoHo!!  They’d better get a whole lot more than a dollar for THIS basket!!

Written by Karin


Friday, September 28, 2012

Anyone need a few hundred coin purse frames?


 I actually put my co-workers to work at IHAN ®.  With all the Coin Purse Frames I had to order for the "U R Priceless Blog Hop" I needed help wrapping all those babies.

While Aaron was working on his homework, Zach and I wrapped over 200 Coin Purse Frames.  Why he felt the need for those "safety" goggles....is beyond me.  LOL

We had to be sure there were enough frames for all who wanted to join in the "UR Priceless Blog Hop" as well as those who got hooked and could not stop...LOL.  

I've made a few of the coin purses already and they are pretty quick and fun.  Today I'm going to do some Machine Embroidery and make one.....I hope it turns out well.  I think they will make wonderful teacher gifts as well as for other gals in my life.

Those participating in the "UR Priceless Blog Hop" ,  have been provided with a pattern and tutorial. 
For the rest of you who are not participating or you would like to see other patterns and tutorials, I posted a few good tutorials I found on the web. 


I have several other versions of Sew In Snap Frames on the way for the holiday gift making season.   The good news is, I've added a discount ...the more you buy...the more you save.  I figured this would be good for those who want to make them for the holidays, birthdays, Thank You gifts.....and on and on.  I know many gals who get hooked on something and make several.

On the Flamingo Front:

 Apparently that's what is on the agenda this weekend for the Flamingo Flock.  Next weekend we are supposed to be the "Turkeys" camping out...in early October, with the Cub Scouts.
I just hope we are this cozy!

Speaking of Fall....look at this beautiful sunflower....I took this photo a few weeks ago just before a class to make some Wool Felted Pumpkins.
My girlfriend, Diane, had previously ordered some Wool Felting kits from the gals at Back to Back Alpaca.  She was thrilled with the price and the quality of the kits she ordered.  Diane suggested a group of us get together and do a Felted Wool Pumpkin....you know I was game :)

Waldo was up for some fun too......as was my youngest co-worker, Zach.
 He really enjoyed being able to "poke, poke, poke, poke, poke....." the felted wool.  Something about that repetitive activity had his attention the entire time.

Take a look at  some of the Felted Wool Pumpkins that were made that day from the kits we ordered from BacktoBackAlpaca.com


This one is mine.  I didn't think it turned out so bad considering it was my first time.

Some gals didn't care for the faces so they enjoyed making the Felted Wool Pumpkin Sans the Face :)
This can be used all the way through Thanksgiving too.

Now I'm off to sew!

Big Ole Happy Smiles,
Kelly

Thursday, September 27, 2012

Fun Halloween - A Guest Post by Karin

GUEST POST by KARIN....take it away Karin


Lucky me, I was gifted a stack of 6 Dunroven dish towels, and being the generous soul I am, I figured I’d share my thoughts with y’all.  My very first thought was, “How pretty! What a lovely shade of purple.”  My very next thought was, “This is really pretty, but, my goodness, how very purple.  Who in the world decorates their kitchen with purple?”
So I put ‘em in the closet and there they sat for the next 3 6 months, while I pondered what I could do with them.  (pondered – that word rolls around in my mouth the way those towels were rolling around in my head!)  And they sat, and they sat, and they sat some more. 
Finally, I got an idea! Halloween fabrics often include purple, and Halloween is coming up fast! So I found this cute little door-hanger from Embroidery Library and decided I could use one of the towels for my background fabric! Yeah, that’d be just perfect!

So I get ‘em out of the closet and take one out.  Wow, it really has a nice hand to it…surprisingly so.  It was evenly woven and weighty (for a towel, that is), but it still had a nice drape to it.  Then I unfolded it, and that sucker is H.U.G.E!  A full 20 by 28 inches!

 
And it had a nice little cotton twill loop for easy hanging, too.


Hmmm….but it’s still very purple.  Now, my little door hanger probably wouldn’t get washed much, so shrinkage and even some fading was probably not gonna be an issue, but since I was gonna share with y’all,  I’d share everything, the good, the bad and the laundry, so I threw the whole bundle in the washer to see what would happen.  They seemed to fade just a wee bit, and the purple lightened up a little.  Not much.  After a tumble in the dryer (set on med/high), they came out a bit smaller than they went in and a little wrinkled.
They now measure about 19 by 27 inches, so they shrank about an inch all around.  If you’d embroidered on them prior to washing, you’d surely be upset with that much shrinkage, so, for best results, just be sure to launder these prior to spending hours on a machine embroidery project.  Nothing like surprise shrinkage to spoil your fun!
But, let’s get back to the project!  A quick touch-up with a hot iron and they were good as new, but about an inch smaller.  When you purchase an in-the-hoop embroidery design like this, it usually comes in two parts – a outline and the embroidery itself.  The first thing I did pull out my roll of Floriani Double Sided Fusible Stitch N Shape and cut a piece off.  Ummm…now what?
I knew I’d never get that roll back into its cellophane wrapper, so I grabbed my roll of Hugo’s Amazing Tape!  And for those of you that have never used it, you just don’t know what you’re missing.  There’s about a million uses for that tape, and it truly IS Amazing.  I use the blue tape because it’s easier to find when you accidentally lay it down for a second, but it also comes in clear, for the people that need to see true colors.

But, I digress.  Next, I cut the end off of one of those beautifully purple towels to use as the base fabric of my in-the-hoop door hanger.  I fused my Stitch N Shape to the fabric with a hot iron.  And for future knowledge, when they say double-sided, they MEAN double-sided.  When I tried to pick that puppy it, it was fused to my ironing board!  In hindsight, I should have used a pressing sheet *or something* (maybe even a ONE-sided fusible??) to protect my ironing board!
So, anyway, I took my fabric/stabilizer fusion and laid it onto a piece of Floriani Perfect Stick that had already been hooped. 
I slipped the whole thing into the embroidery module and l was all set to start stitching once I selected my thread colors.  I decided on lime green, orange, and white, and this would have been the perfect chance to try out some of that glow-in-the-dark thread, but I didn’t have any!  L  I used some iridescent white instead.  It won’t glow in the dark, but then, there’s hardly anyone walking around in the dark at my house, so it really doesn’t matter.
When you get an in-the-hoop embroidery design, you usually get two files.  The first is the outline, that gives you just the outline of the project, and the other file is all your color stops that provide the details of your project.  You can see how I’ve stitched the outline here (try to use a complimentary color in your stitching, just in case the final satin stitch coverage is less than perfect).


I used a contrast color just so you could see the outline.  You can also see that unexpected color change – I didn’t know I was using a bobbin as my top thread, and I ran out not long after I started stitching!
I pulled that hoop out and removed the fabric fusion from the Perfect Stick.  I literally cut on the dotted line to get the top layer for my door hanger.  Remember, this is fabric fused to Stitch N Shape, so it’s nice and thick, and easy to manage.  Stitch N Shape doesn’t gum up or snag your needles, but it holds its shape nicely.  It’s just right for making fabric bowls and boxes or giving body to purse inserts.

Next, I had to get the backing fabric cut to the same shape.  So I hooped another hunk of purple toweling (it’s a lovely shade of purple, but I *still* don’t see it as a kitchen accent!!), only this time, I just laid a scrap of generic paper tearaway on top of my Perfect Stick and then the fabric on top of that (hence the pins), and stitched the outline a second time.
What you have to remember here, is that this piece is going to be the BACK of your project.  That means, you’ll need to reverse your fabric OR reverse your design.  Oopsies!  Luckily, the toweling is the same on both sides, so it didn’t matter.
Here’s another shot of that Hugo's Amazing Tape – I tell ya, there’s a million uses for it!
 So, how did  everything turn out?  Well, thanks for asking!

Obviously, I need to trim the edges a bit more, but, overall, it’s kinda cute.  It’s probably not exactly what Dunroven had in mind when they made that towel, but it sure fit the bill for me!  And I still have half a towel left that I could turn into appliqued grapes or an eggplant on something else! 

THANK YOU KARIN!

(The funniest thing is that I'm in love with the purple kitchen towels and of course I have them in my kitchen.....and here my girlfriend is saying they are "way out there" LOL....another something to smile about today)

Smiles,
Kelly


Wednesday, September 26, 2012

Our Local MEG Presents at the Black Swamp Quilt Guild

The Black Swamp Quilt Guild had a wonderful Machine Embroidery Presentation at our last meeting.  It was hosted by  Diane Giveins, President of our local Machine Embroidery Guild( MEG) and Nancy Lee, who has been crowned "The Queen of Machine Embroidery."

  I thought many of you would enjoy seeing all the beautiful items that were shared.  Keep in mind, it was these two ladies that taught me about the excellent quality of Floriani Machine Embroidery Products.

Three women brought their Embroidery Machines, all different brands, to demonstrate a different technique or style of ME.   Nancy Lee brought her beautiful Brother Machine, Pam Moffatt brought her Janome, and Judy Breen brought her Pfaff.  These ladies are all members of our local Machine Embroidery Guild (MEG).

ON TO THE SHOW :)


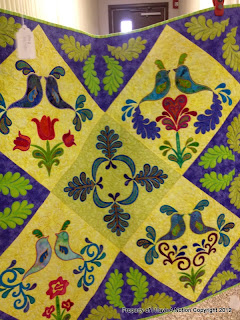
This Wildflower Quilt was a guild project for our Machine Embroidery Guild.  The first to finish was Annie and you may remember I showed her quilt on THIS post.

Art Journal
 Greeting Cards....did you know how fun and easy these cards are to make?

 For those of us who may be challenged with Free Motion Quilting...there's always Machine Embroidery Quilting! 


The show also included some beautiful Machine Embroidery and Quilting by Patsy Thompson Designs.

The combination of Patsy's Free Motion Quilting and Machine Embroidery really take her designs to a new place. 

This is an example of Patsy's Hyperquilting added to her Machine Embroidery Designs.


I love the idea of using ME on pillowcases....How could this not make you smile?   I want some for every holiday : )
 The cutwork on these towels is beautiful.


These are lovely luncheon napkins....you know if someone had those out, I"d never wipe my mouth or fingers on them....they are just so beautiful. 


I bet there is not a kitchen towel in these women's houses that isn't beautiful.

 These are a pair of Nancy Lee's pants.  She has embroidered on the leg and I'm telling you they are so much fun.  

Can you imagine sitting and piecing at one machine while the Embroidery Machine works next to you?  LOL....some people say they do that....but I'm still in the "In Love" phase and I sit and watch Maddy Jo do her thing.


 These designs were done on batting .  I think they would make lovely ornaments, embellishments for cards or gift toppers. 


There was so much shown I could not possibly take photos of everything.  Suffice to say the presentation was educational as well as very entertaining.  Nancy Lee had made several little gifts and during the lecture she would periodically throw one or two out into the audience.  That was fun to see.

I hope you got a few ideas of what can be done with an Embroidery Machine and enjoyed these ladies beautiful work.

Smiles,
Kelly

Translate

Related Posts Plugin for WordPress, Blogger...